I am writing this post in hopes of helping any other teachers who happen upon my blog and are looking for advice about returning to work after a maternity leave. It is an anxious, emotional time, and I hope I can help ease your transition by sharing about my experience.
At the beginning of this year, I missed the first 12 weeks because I was out on maternity leave. This means I didn’t get to set up my room or meet my students until we were well into the school year. On top of all that, it was a new position for me, so I really had NO idea what I was coming back to. A new grade, a new age level, new material, new room, new everything. It was a lot to take in.
Luckily for me, I had an amazing substitute teacher who made everything so helpful and efficient for me. Additionally, my district gave us 3 overlap days where we were both in the room – that helped with the transition immensely. On the first day, I simply introduced myself to each class and sat in the back to observe the atmosphere. By the second day, he was still teaching, but I became a support in the room, traveling amongst the students and asking questions, listening, and assisting. By the third day, I was leading the lesson while he supported. On the fourth day, I was all alone but feeling confident.
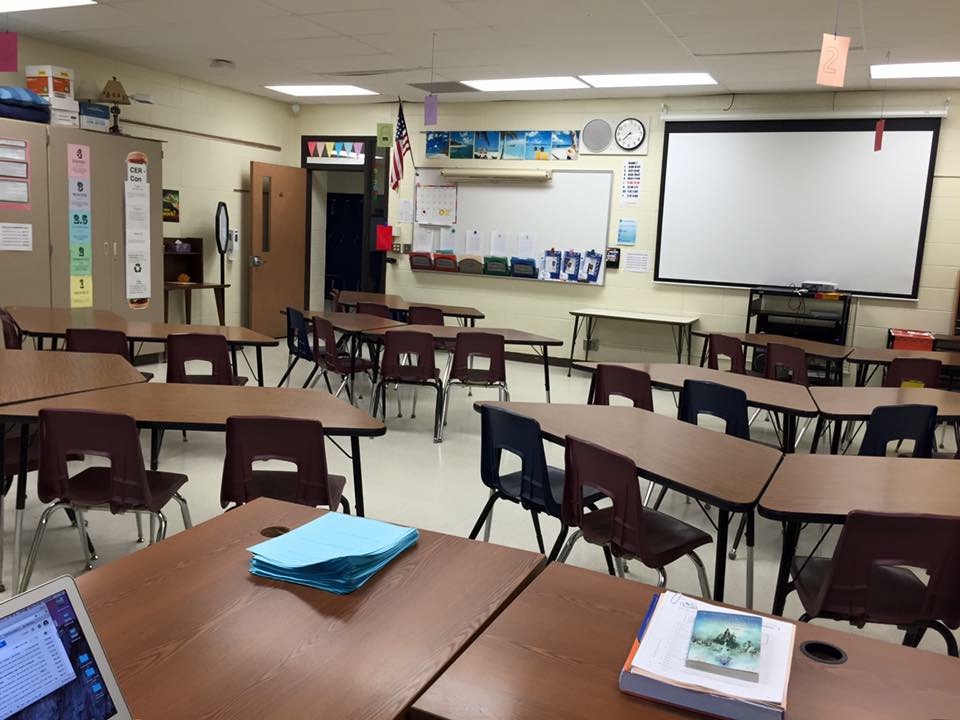
My first day, waiting for my students to arrive.
Throughout this post, I have shared my personal choices and experiences, including what worked well for us and what is (and continues to be) a struggle. Feel free to ask questions or share your own experience in the comments – I’d love to learn and do better!
Daycare
My husband and I chose to leave our daughter in a daycare center while we work. I know there are many different options for childcare, and people tend to turn up their nose when we say we chose a daycare. However, I chose to focus on the positives of daycare: my daughter will be cared for by certified staff, there will always be multiple adults on hand, she will be exposed to learning activities and many different kinds of people (and germs!), and she will be socialized for school.
Leading up to the first day of daycare, I took my daughter to the center a few times and just sat in the infant room with her. I did this so we could both get use to the atmosphere and the people. It gave me a chance to observe the routines and to ask a lot of questions. The staff said they didn’t mind (I hope they meant it!) and even encouraged me to come as many times as it took to feel comfortable. And each time I came in, I brought in more supplies for her drawer (diapers, wipes, outfits, creams, pacifiers, etc.) so that I wouldn’t be burdened with that ask on the first, hectic day. By the way that’s a big theme in my life – prepare, plan, do things in small chunks, and get it done before a deadline.
At first, sitting in the room was terrifying. There were babies crying and so much activity. I felt I had made a huge mistake. I wanted to quit my job and stay home forever. But then I got a hold of myself (and my crazy postpartum emotions) and became more settled with the idea the more I visited and self-talked. Everything would be okay. This is a good thing for everyone – mom and baby.
It is a very strange feeling to leave your child in the hands of someone else, all so you can go to your classroom and take care of other people’s babies. But this is my calling.
I have to tell you that I am so grateful that my husband does the drop-off each morning. If I had to do it, I would always arrive at work a total basket case (that’s if I would actually able to detach myself from my daughter and leave the daycare building). I do the pick-up, and it is definitely the best part of my day.
A big tip I have for you: Do NOT call in the middle of the day to see how your child is doing. I fell into this trap on my first day back, because I wanted to make sure my daughter was doing well on her first day, too. I couldn’t even make it through the phone call without crying. For me, it is best to just keep busy and let the professionals do their job. I had to have faith that if they needed me for anything, they would contact me.
The First Day
The first day – okay week – is THE hardest. People mean well, but everyone will ask you trigger questions like, “What’s it like to be back?” and “Who has your daughter?” and my favorite, “How was it leaving your daughter today?” I cried each time someone asked me any of these questions. Hormones, man. I sat in the bathroom and cried during passing time. It was hard. When the bell rang at 3:05, all you could see was a big blur behind me as I bee-lined it to the parking lot and attempted to follow all traffic laws on my way to pick her up from daycare. It will get easier. REPEAT: It will get easier. Everyone told me that, but I had to experience it for myself. Now I take my time leaving. I go to the bathroom and wash my hands before I leave work (because I won’t get a chance when we get home!).
Focus on your job and why you are there. Try not to think about your baby. You need to stay in the moment. Your baby is in good hands, and you are needed here, now, to take care of these babies. It will be okay, and it will get easier!
Nightly Routine
I have lots of routines to help me get through life, and this should be no different. I quickly figured out a routine that worked for all of us to help make the nights and mornings go as smoothly as possible. This is survival, people!
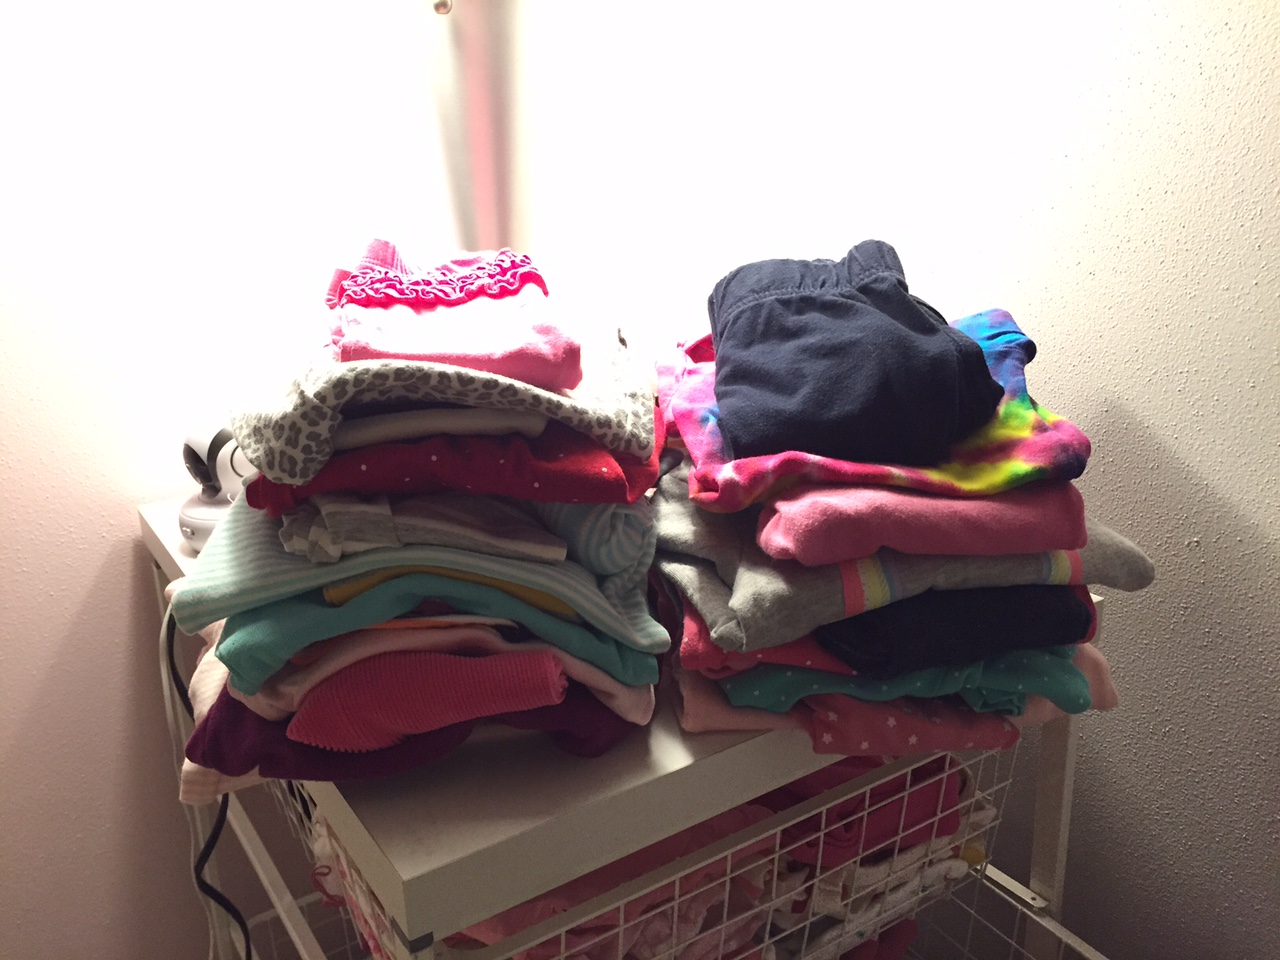
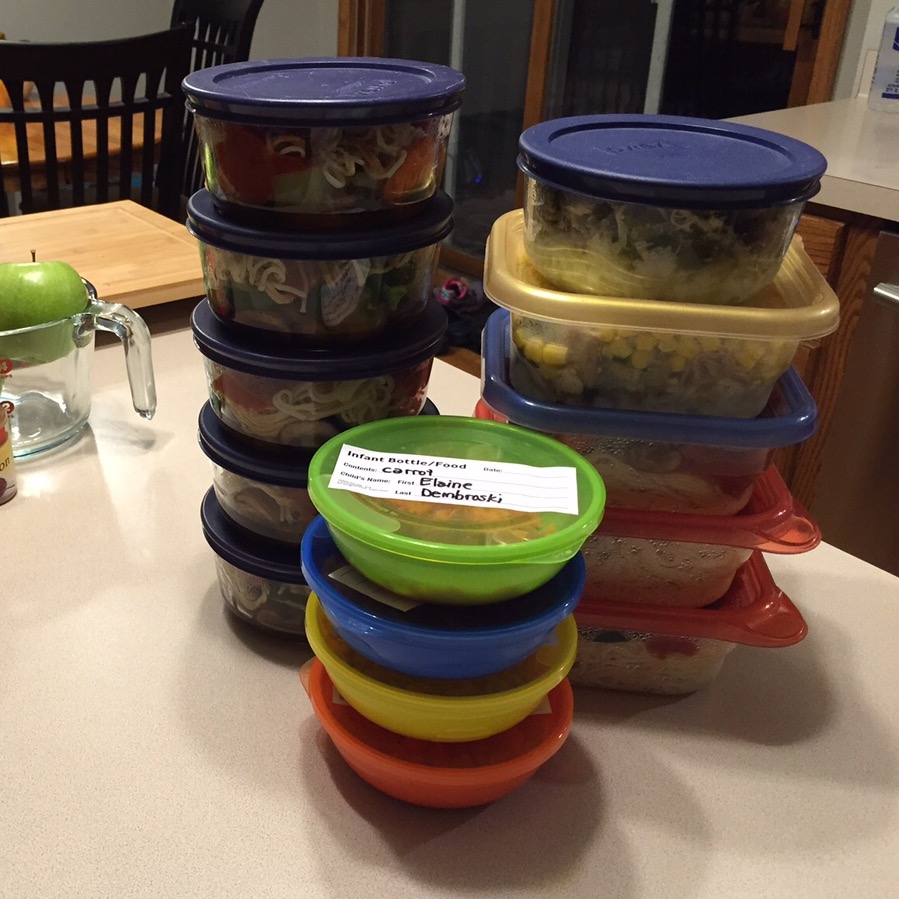
Each night, I put my daughter to bed around 6:30pm. Then, I immediately wash and reset the bottles for the next day and pack them in her lunch bag in the fridge. I add any notes or supplies she may need right in the bag so it is ready to go. I pair up all of her clothes when I wash them on the weekend so her outfits are ready to grab-and-go in the mornings:
For myself, I also make my lunch, set out my clothes, and take a shower. I used to take 1 to 1.5 hours to get ready in the morning (let’s be honest, I used to putz. I checked my email, did some house work, etc. Not anymore!). Now, I can get ready in 20 minutes flat. This is important, because you don’t know how your morning will go. Will she be sick, sad, or needy? Will you just NEED a cuddle? Be ready for anything. Preparing the night before is essential to having a smooth morning.
After I’ve gotten all of her things and my things ready, I spend about 20 minutes TOPS straightening up before bed, because it makes me feel good. Then I tackle my nightly chore from the next section (Housework and Errands), and I’m done.
For my own sanity, I attempt to go to bed as close to my daughter as possible. My goal is to be asleep by 10pm, and my alarm is set for 6am. This way, I am lucky to get 8 hours of sleep between all of the night feedings and wake ups. You have to preserve your sleep! Make it a priority. Skip all non-essential things and just S.L.E.E.P. It is how you survive being a teacher and a parent – two incredibly draining and demanding jobs.
Housework and Errands
I have also had to adjust the way I run our house. I used to do almost everything on the weekends – cooking, cleaning, and chores. Now, however, I want to covet that as family time (and down time). To that end, I have made a schedule where I do a little bit every day, like the old adage of eating an elephant. I also try to run short errands right before I pick up my daughter from daycare. Eventually, we’ll get to the point where I will take her on the errands, but right now it’s easier to do this way and just leave her in daycare an extra half hour.
Also RE: Amazon Prime / Amazon Mom: JUST DO IT. Seriously. It makes your life so much easier.
Here is an example of our weekly schedule, designed to free up our weekend time (Do I actually get to all of these things? No, but I do try):
Monday
My Laundry
Clean Shower
Clean toilets
Tuesday
Bathroom counters
Wash towels
Wednesday
Vacuum / mop
Windex glass
Thursday
Disinfect Kitchen
Clean out fridge and microwave
Dust
Friday
Bathroom floors
Change sheets
Saturday & Sunday
Groceries
Cooking
Daughter’s Laundry
We have tried to make grocery shopping a family activity, as well. My daughter really likes all the sensory experiences of a grocery store.
During weekend nap times, I cook. This is how I SURVIVE, people. I make all of our lunches on the weekend so they are ready to grab-and-go. I also try to make a casserole or dinner for the evenings. But honestly, I usually don’t have time for dinner and just skip it (oops). This preparation saves a huge amount of time and money throughout the week.
Grading and Working At Home
What I have to say about this is short and sweet: FORGET ABOUT IT. You will no longer do any schoolwork at home. Oh, you’ll have good intentions. You’ll bring home a bag full of things to do, emails to check, etc. But you won’t do it. Nope. You’re exhausted, and you miss your baby. My best advice is what I have learned to do – do not leave work until you have done everything that MUST be done by tomorrow. Emphasis on must – you do have to stop and leave at some point. Maybe you can finish grading those papers tomorrow? Prioritize. Just don’t bring it home. It will sit in your bag / car and it will haunt you.
New Perspective
As a new parent, I find that I have a new perspective on my role as teacher. I have done a lot better job of communicating with parents, now. I also try my best to include them on as many decisions as possible. I always thought I was doing a good job with this, but now I see that I could do even better. Even though my students are ‘grown up’ 11-year-olds, their parents still like to hear nice things and be kept involved. At this age, many parents begin to start distancing themselves from the school in hopes of encouraging and allowing more independence from their children. I do my best to respect that, but also see that information is always welcomed.
As a new parent, I also see that I have so much more empathy and patience for my students. I love them all, each one, but now I also see them as someone’s baby. Everyone is someone’s baby!
Closing Thoughts
You will be awesome
This is what you were born to do. You will rock it!
I was so fortunate to be allowed to spend a day at the 2016 WSRA convention this year. It was incredibly energizing and inspiring! I feel that every teacher should attempt to make it to a convention at least once a year to be reenergized and infused with exciting new ideas to try in the classroom. I got to meet several famous authors and researchers, and I felt like a total fangirl. I also came back with a plethora of ideas to share with my colleagues.
I’ll get straight to the point and share with you my top 5 take-aways from the day.
I need to buy these books ASAP
Limit Teacher Talk to 1/3 of your instructional time
In an excellent session by Cris Tovani, she explained her Student Engagement Model and how she limits her Teacher Talk to only 1/3 of the time. The remaining time is students ‘doing’ – practicing, exploring, and producing. That’s difficult for the die-hard lecturers amongst us, but it is a necessary shift for so many critical reasons!
Breaking the Vocabulary Code
One of my favorite sessions by far was “Scaffolding Complex Text to Maximize Student Learning” by Mecca Sadler and Natalie Bourn. I got so many excellent ideas for incorporating more deep-thinking vocabulary activities into my lessons.
A few ideas I want to try immediately are the Vocabulary Triangle and the Image Explanation
.
For the Vocabulary Triangle, you invite students to place a different vocabulary word they are working on at each of the triangle points (tell them to choose the hardest word, the easiest word, and a medium word). Then, on the connecting lines, they need to write a sentence that explains how the two words are related.
For the Image Explanation, you present students with an interesting image and ask them which of their vocabulary words it is related to. THIS IMAGE REPRESENTS ____ BECAUSE _____ There is no one right answer, and you can discover evidence of their processing by listening to the connections they make. For example, let’s say my students are working on the following words:
transgression
excruciating
apprehensive
carnage
obsolete
And then I present them with this image:
You can see how they could use nearly any of our vocabulary words to complete the idea “This image represents ____ because ____.” I can’t wait to try this idea out! The presenters said this activity would also make a great assessment tool as well. Real life application!
So long, Venn Diagrams
From the same presentation by Sadler and Bourn, I learned about using a Y shape instead of a Venn Diagram for comparing and contrasting. The legs at the top can be for contrasting two items, and the stem at the bottom is for comparing what they have in common. The added bonus of this shape is it reminds us to ask, “why?” at the end. As in, why did the author(s) make the choices they made? I plan to use this idea next week to compare several dystopian fiction stories that my students read.
There you have my highlights of the convention! Not to mention seeing a lot of wonderful friends and colleagues. I look forward to the 2017 Convention!
Ah, the dreaded student presentations. Not for you, the teacher – You are so excited to see the fruition of students’ hard work. You can’t wait to see all of the wonderful ideas and revelations and evidence of learning. The students, on the other hand, are simply waiting to ‘get it over with.’ And when they are not presenting, they are sitting there, totally checked out, waiting for these hours, nay days, of presentations to just end already.
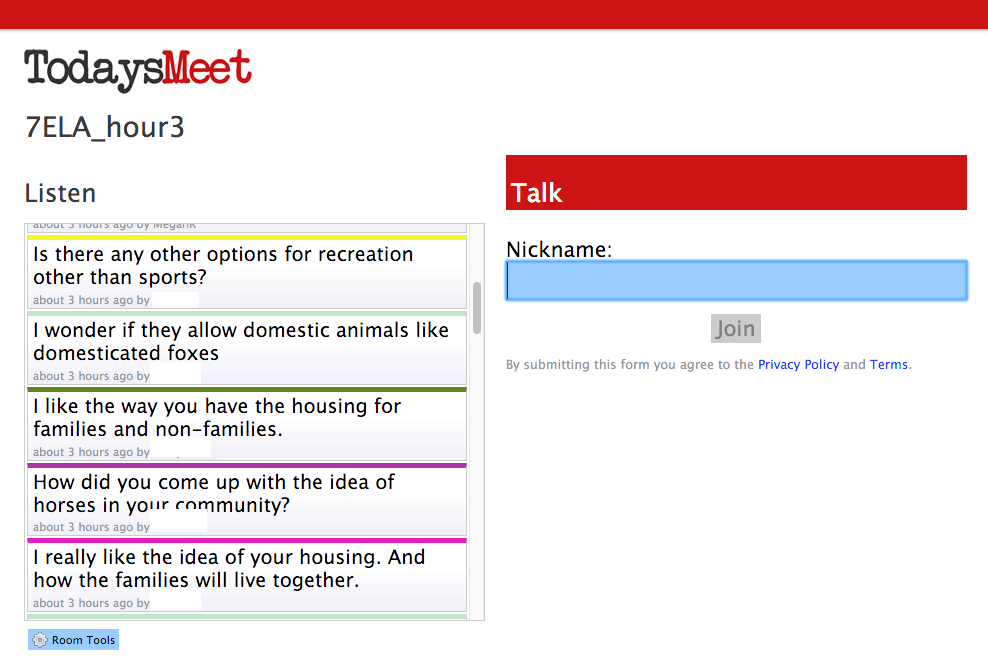
I know that many of you have excellent, tried-and-true methods for livening up presentations and engaging the audience: note-taking, exit slips, peer assessment, question response, etc. For this blog post, I’d just like to share one new tool with you – Today’s Meet.
Todays Meet is incredibly easy to use. I can even set up a ‘chat room’ on the fly, right there in class. I simply tell my students the web address / url, and when they arrive there, they log in with an appropriate nickname (First Name + Last Initial, for instance).
During student presentations, I require every student to post one thought, either a:
Question
Thought
Suggestion
I like to have Todays Meet up and running on the projector screen behind the presenters, so we can all see what is going on. However, if this is not possible, I can also have it running on my laptop to the side. At the end of the presentation, the presenters can check the Todays Meet feed and choose 1 or 2 posts to respond to for the class. For more advanced or practiced students, one member of a presenting team could be fielding important questions on Todays Meet during the presentation as well.
Benefits:
Students have a directed purpose for listening
Students are engaged in the presentation
Students can record their questions or thoughts as soon as they think of them
Students can engage in a back-and-forth discussion in the chat room
You can print out the transcript
Challenges:
It requires modeling and instruction up front – be clear about expectations
While students are typing their question or thought, they may miss a bit of the presentation
You need to ‘Let Go!’ of your expectations of proper spelling and grammar
It’s another fun and efficient tool to use to keep the student audience engaged, to gather useful feedback for the presenters, and to keep students thinking about the content of the presentations. You may be pleasantly surprised at the thoughtful responses students pose to one another, showing yet another layer of learning!
I bet you can think of hundreds of ways to use this online tool to engage your students in deeper thinking and connecting. Book chats, anyone?
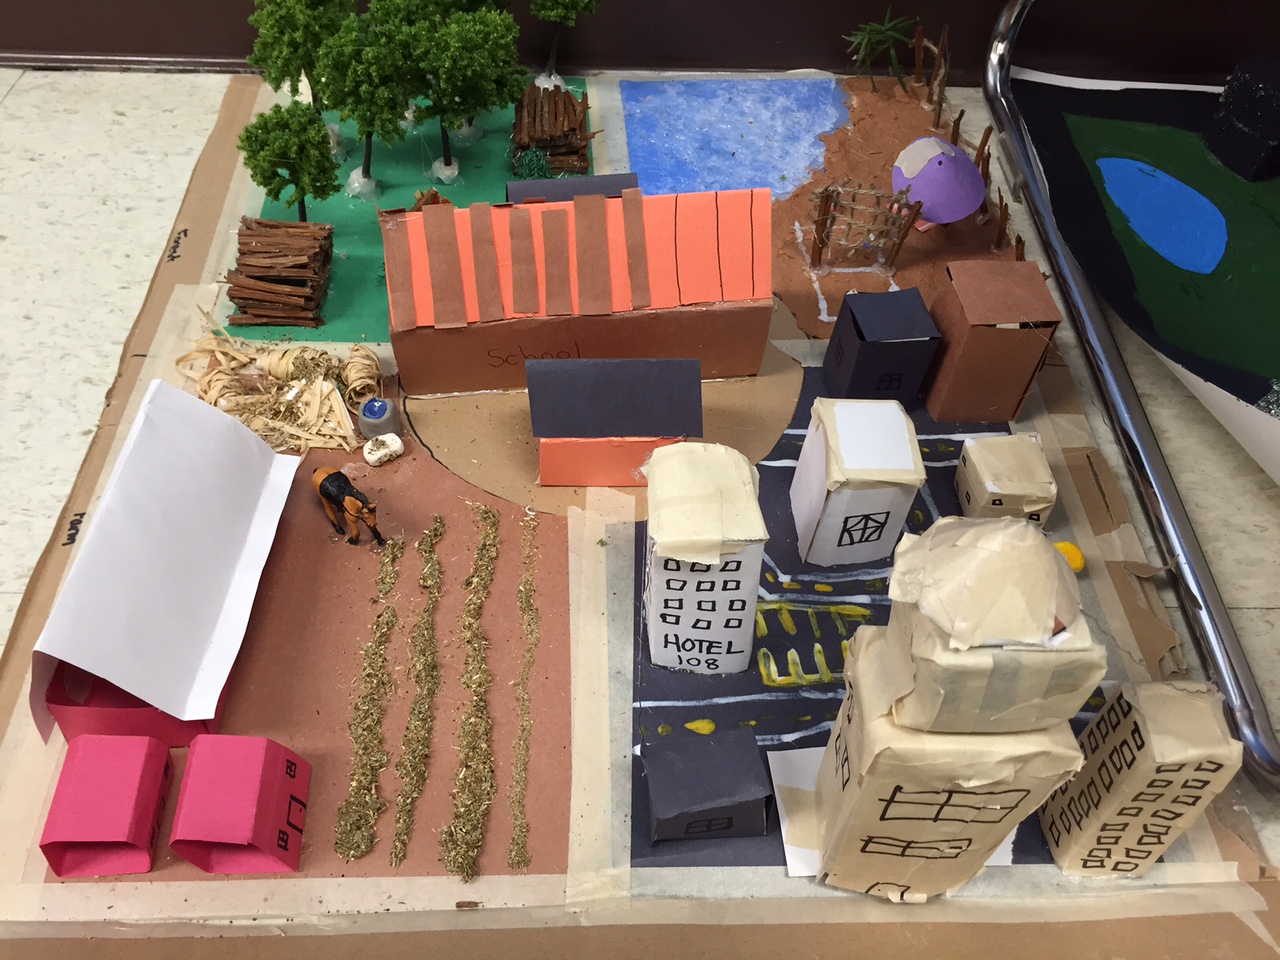
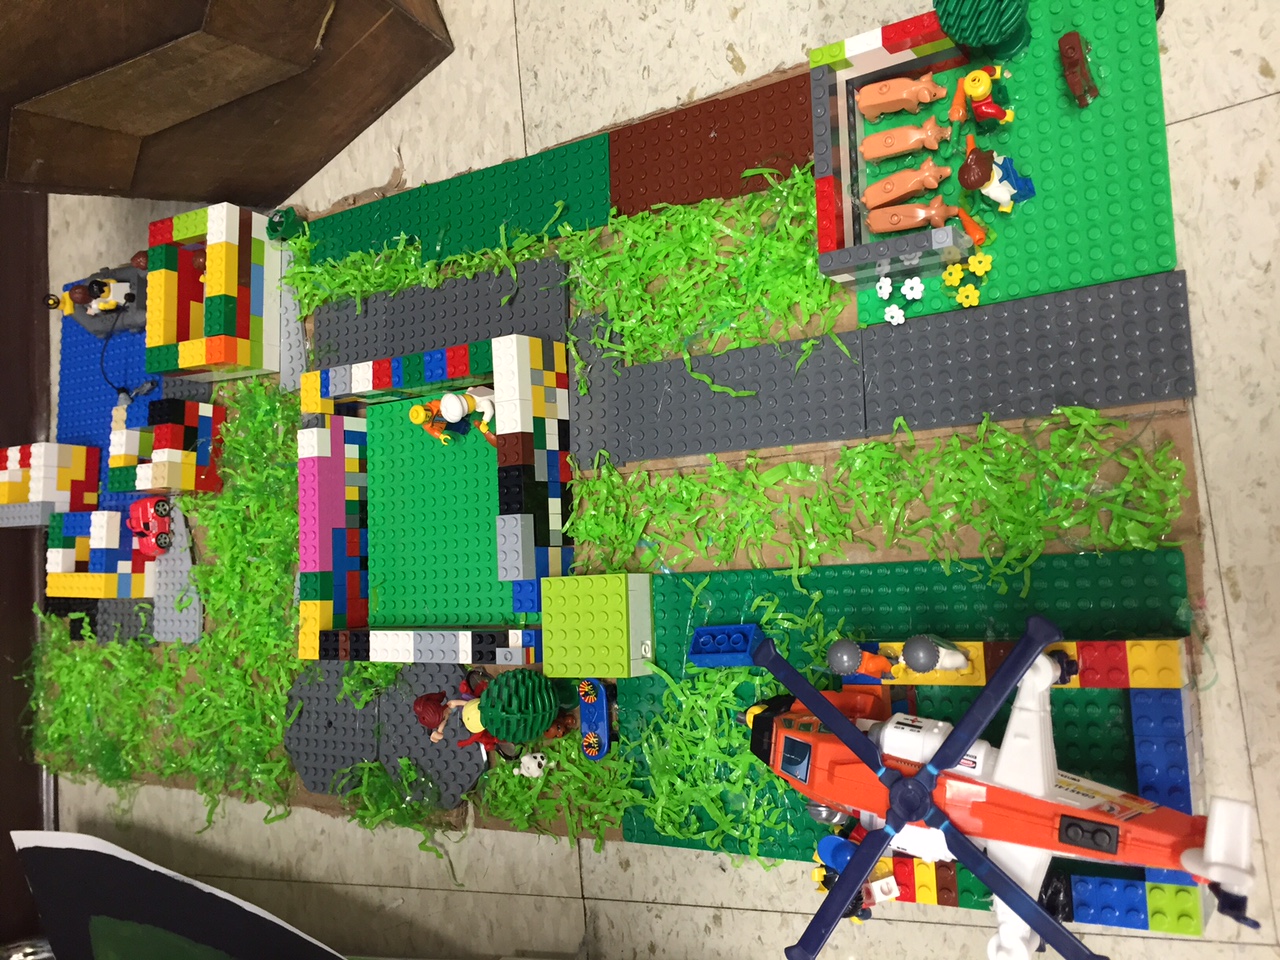
Before starting our next novel unit on The Giver by Lois Lowry, my classes are investigating utopias to lay some groundwork for their thinking. First, I had them read about 3 real life utopias, including The Farm, Twin Oaks, and Acorn Community. They spent a class period reading and learning, then drawing conclusions about common features of successful utopias. Next, I had them think about what they would like to see in their very own utopia – what kinds of problems they would like to solve, and how they can build a successful, sustainable community.
For 3 days, they paired up and created their own personal utopias, complete with:
Values
Government
Education
Family
Housing
Employment
Transportation
Recreation
Technology
I let them create their utopia using any medium they wished (digital or physical), expressing themselves in any way they wished (verbally, in writing, in pictures, drawings, dioramas, etc.). They really enjoyed the freedom of choice and expression for this learning activity.
While they were working, I traveled around the room and did my best to listen and ask thoughtful questions. One group asked for my help when they became troubled about the idea of killing animals for meat, realizing it didn’t jive with their principles of non-violence and peace. I encouraged them to do additional research and see if they couldn’t find a solution for humane ways to kill animals. After quite some time searching, they concluded that there were no humane ways to slaughter animals, so they rebuilt their utopia into a vegetarian paradise. Another group felt that they wanted shortened school days so that children had more time to explore the outdoors and begin career training. They decided to get rid of science classes, which they felt were redundant. I began to question their need for medical professionals, food safety, agricultural engineering, and on and on and on…. and they quickly realized that science was a very important class that they needed to add back into their education plan.
Most of all, I loved watching my students think through problems on their own. This activity encouraged them to do some deep thinking and reflecting on what really matters in our current society, why things might be the way they are, and dream about what they would like to see differently for a better future. They also had to compromise and build off their partner’s ideas.
After 3 days of researching, planning, and creating, it was time to present their utopias to the class. I had the pleasure of watching over 40 presentations, and I noted some very uplifting and hopeful trends across all of the utopias. Overall, these ideas were repeated over and over again in the students’ visions for a perfect world:
nonviolence, no weapons
renewable energy and solar power
respect for nature
democracy
equality and respect for diversity
community service (both mandated for all citizens, and as a first-strike punishment)
Other trends that I found interesting and thought-provoking were the ideas of: government provided housing (everyone rents, no one ever owns), shortened school days/hours so that students could pursue career-related activities, regulated working hours (everyone works the same amount of hours per week, regardless of profession), and more support for apprenticing and on-job training starting in high school (trade schools?). Some disappointing trends I heard repeated were the ideas that social studies is a pointless subject and waste of time (guess we need to do a better job emphasizing the importance of this subject, especially in our democratic society!) and exiling members who disobey (nope, we can’t do that, sorry guys!).
Overall, this was a very enlightening activity, both for me and for the students. I believe it will help them better understand the world that Lois Lowry has created in “The Giver,” and better understand some important themes such as Sameness throughout the book. It could also lay the groundwork for some very interesting conversations in Social Studies about the concepts of Socialism and Communism!
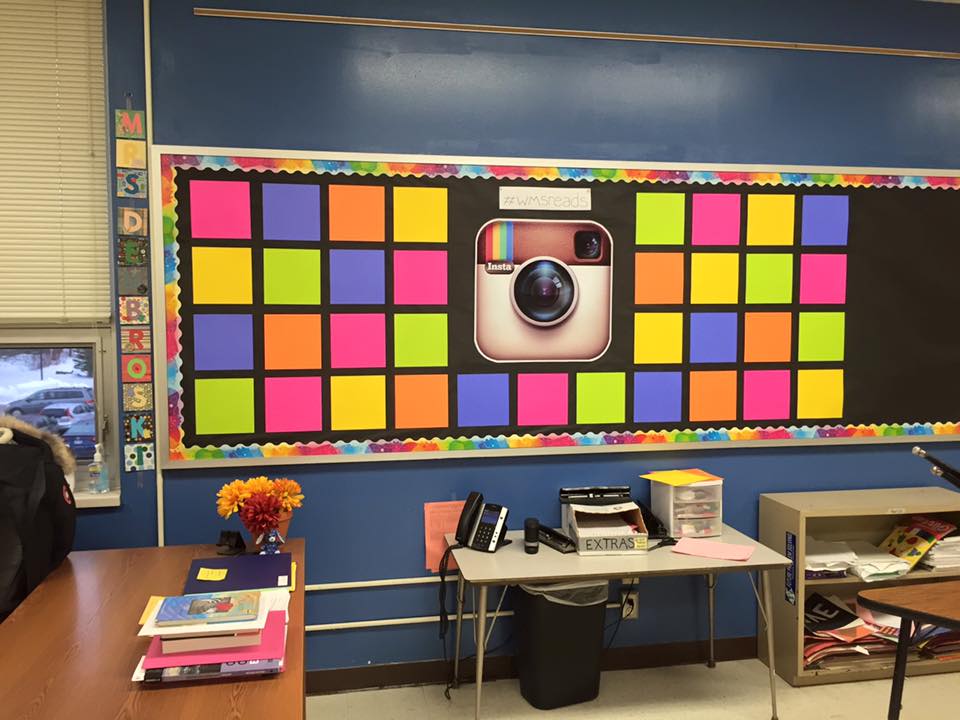
Hooray – I’m working on a fun new bulletin board in my classroom! This one is a take on Instagram, which is widely popular among my students. The board will feature pictures of my students engaging in fun reading and related activities all throughout the school. I’ll snap a few pictures during SSR (Sustained Silent Reading), Library checkout (that shining smile when they check out a new book!) and other candid moments in the classroom. I think my students will really enjoy seeing themselves on the board. Overall, my intent is to highlight the positive reading culture in our school.
The hashtag at the top reads #wmsreads. This is for school use only – nothing will actually be posted on social media.
I’ve slowly been working on this a bit every day for the past month, and they are just SO curious to know what it is about! I told them to wait and see, but the day I put up the Instagram logo? They couldn’t stop talking about it! I can’t wait to see them checking the board each morning to see new pictures. Maybe they’ll be inspired to check out a new book, or ask a fellow student for a recommendation!
UPDATE 5-15-16: See the final product by clicking here!
I’ve literally just had the most amazing year of my life. I have no idea how I could ever top it. Most importantly, this is the year two became three. Our daughter is such an incredible gift. I know all parents say that, I do. Elaine is just such an incredibly happy, positive, delightful person. Everyone who meets her instantly loves her. She almost never cries. She is just very content! She loves to carefully observe everything going on around her. She has these amazing, beautiful eyes and a smile from ear to ear. She wakes up every morning bursting with happiness. The world is truly a better place with her in it.
New Year’s Resolutions
Yes, it’s that time of year to make promises and think about how you want to improve yourself and your life. I feel like I already have everything I could ever ask for in life, so these are my resolutions this year:
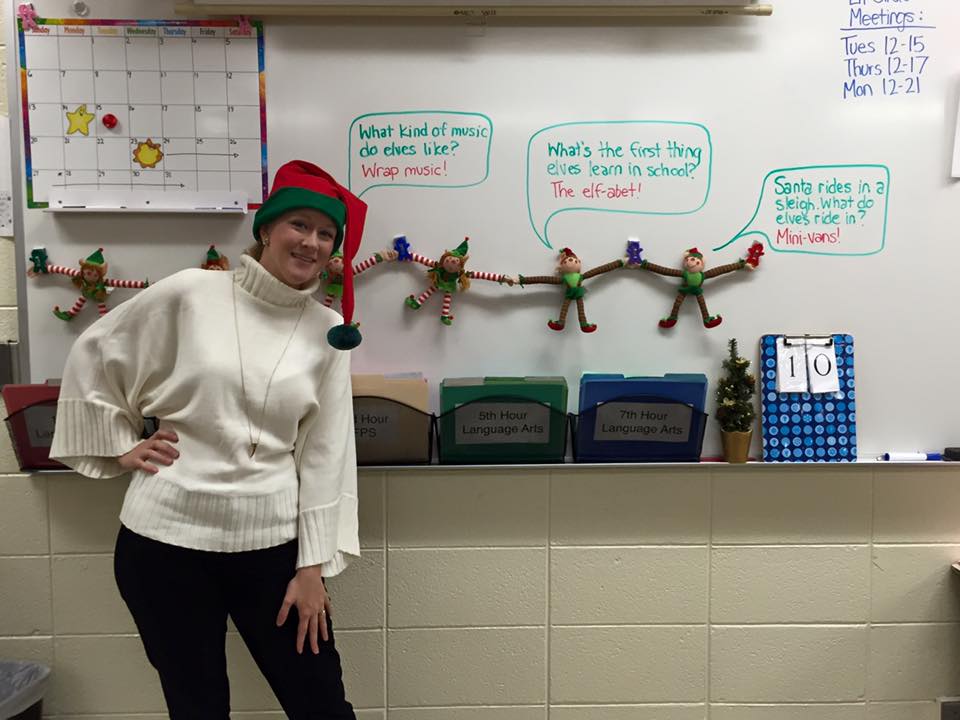
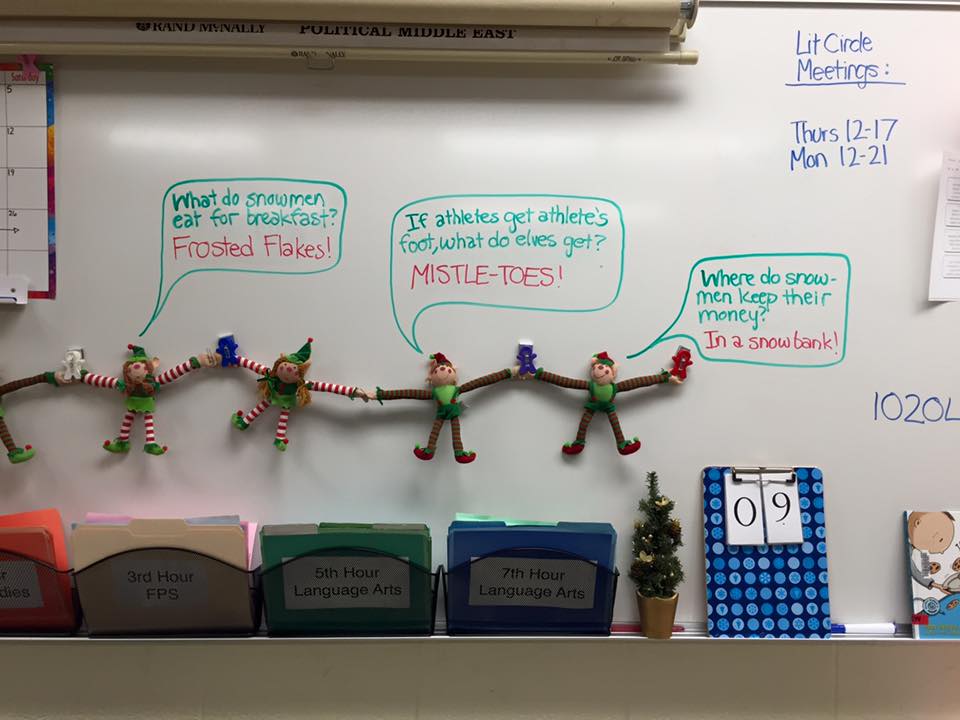
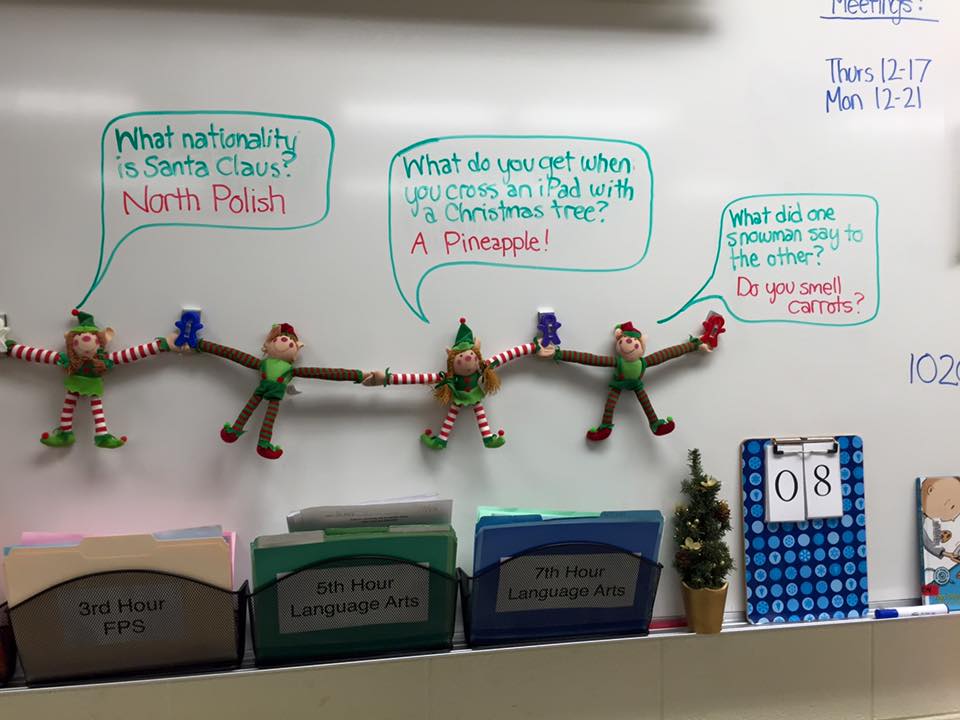
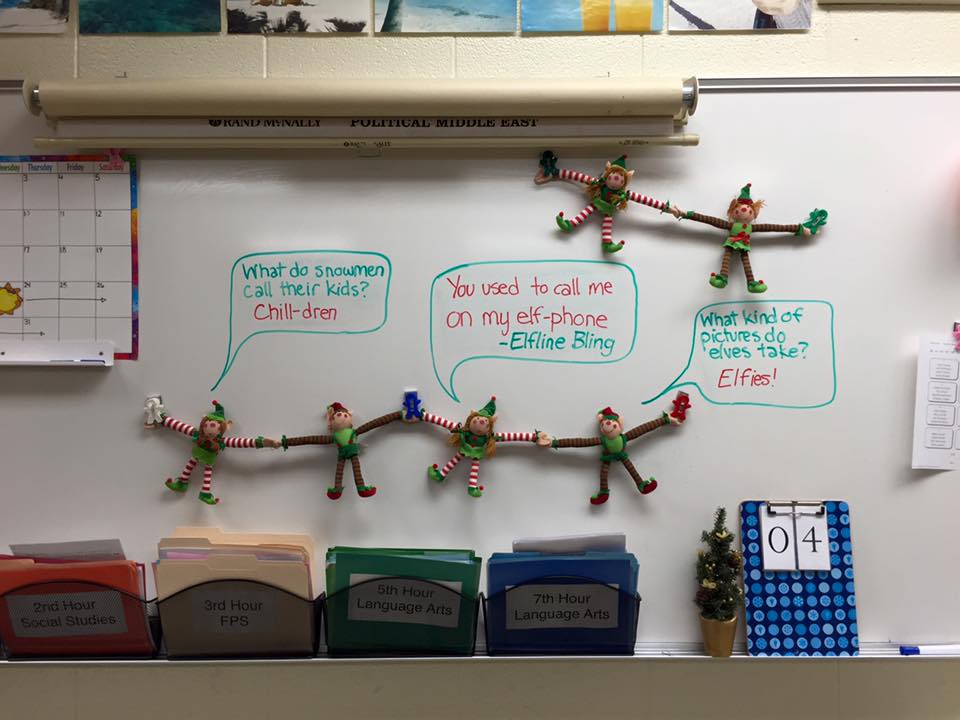
Christmas 2015 was especially exciting for me, because it was our first Christmas as a family of 3. I was so looking forward to it because I knew it would be a much needed break from work and a time to reconnect with my daughter, husband, and dogs. So, I did my part to build up excitement and anticipation at school!
I got my hands on these adorable elves, which I placed on my front board alongside a small Christmas tree and a Holiday Break countdown. Every day, I changed up the jokes on the board. Let me tell you a little something about 7th graders. They really made fun of my jokes, saying they were cheesy and dorky and lame. However, they were equal parts excited when they came in the room every day to read them. That’s the thing – to be cool, you gotta pretend things are lame, even if you really like it. Right? After a while, kids even came up to me suggesting new jokes to add. They secretly loooooved it. Enjoy!
We wrapped up our 2015 school year with an all school assembly including a student-staff volleyball game and a blue-slip raffle (blue slips are given to students who exhibit exceptional responsibility, respect, and safety). I received so many wonderful, delicious, and handmade gifts from my students! I was completely overwhelmed at their generosity. So many treats!
I go back to work tomorrow, but I can say I feel thoroughly rested and recharged. I didn’t get any of the work done I planned to, but maybe that’s ok. I got in a lot of snuggles and naps, and a lot of cooking and eating 🙂 That’s what life is all about, right? Hope you had a wonderful holiday season!
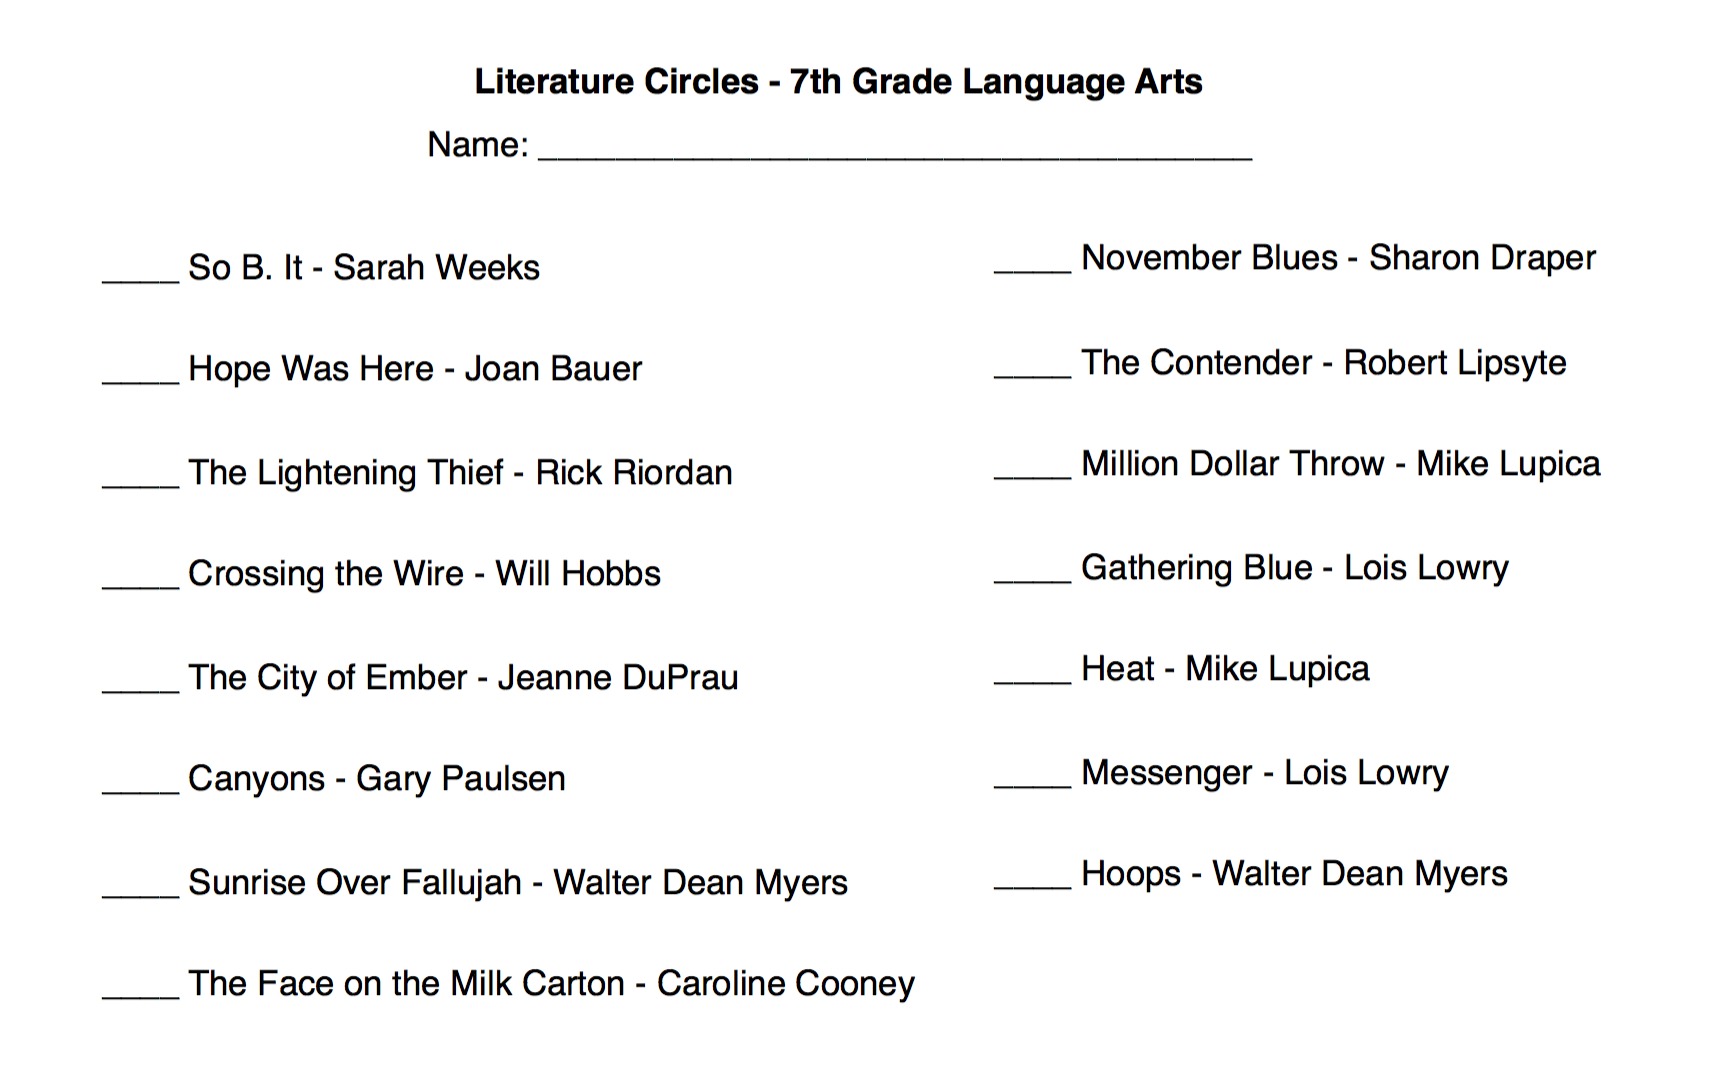
This is my first year teaching 7th grade, and my first time teaching Literature Circles. A Literature Circle is when a small group of students read a shared book and discuss it as they go, as opposed to the entire class reading the same book in a novel unit. I thought I would share how it went, what we did, and what I would do differently next time. It’s a great experience for students, and definitely the perfect learning activity for cultivating a love of reading.
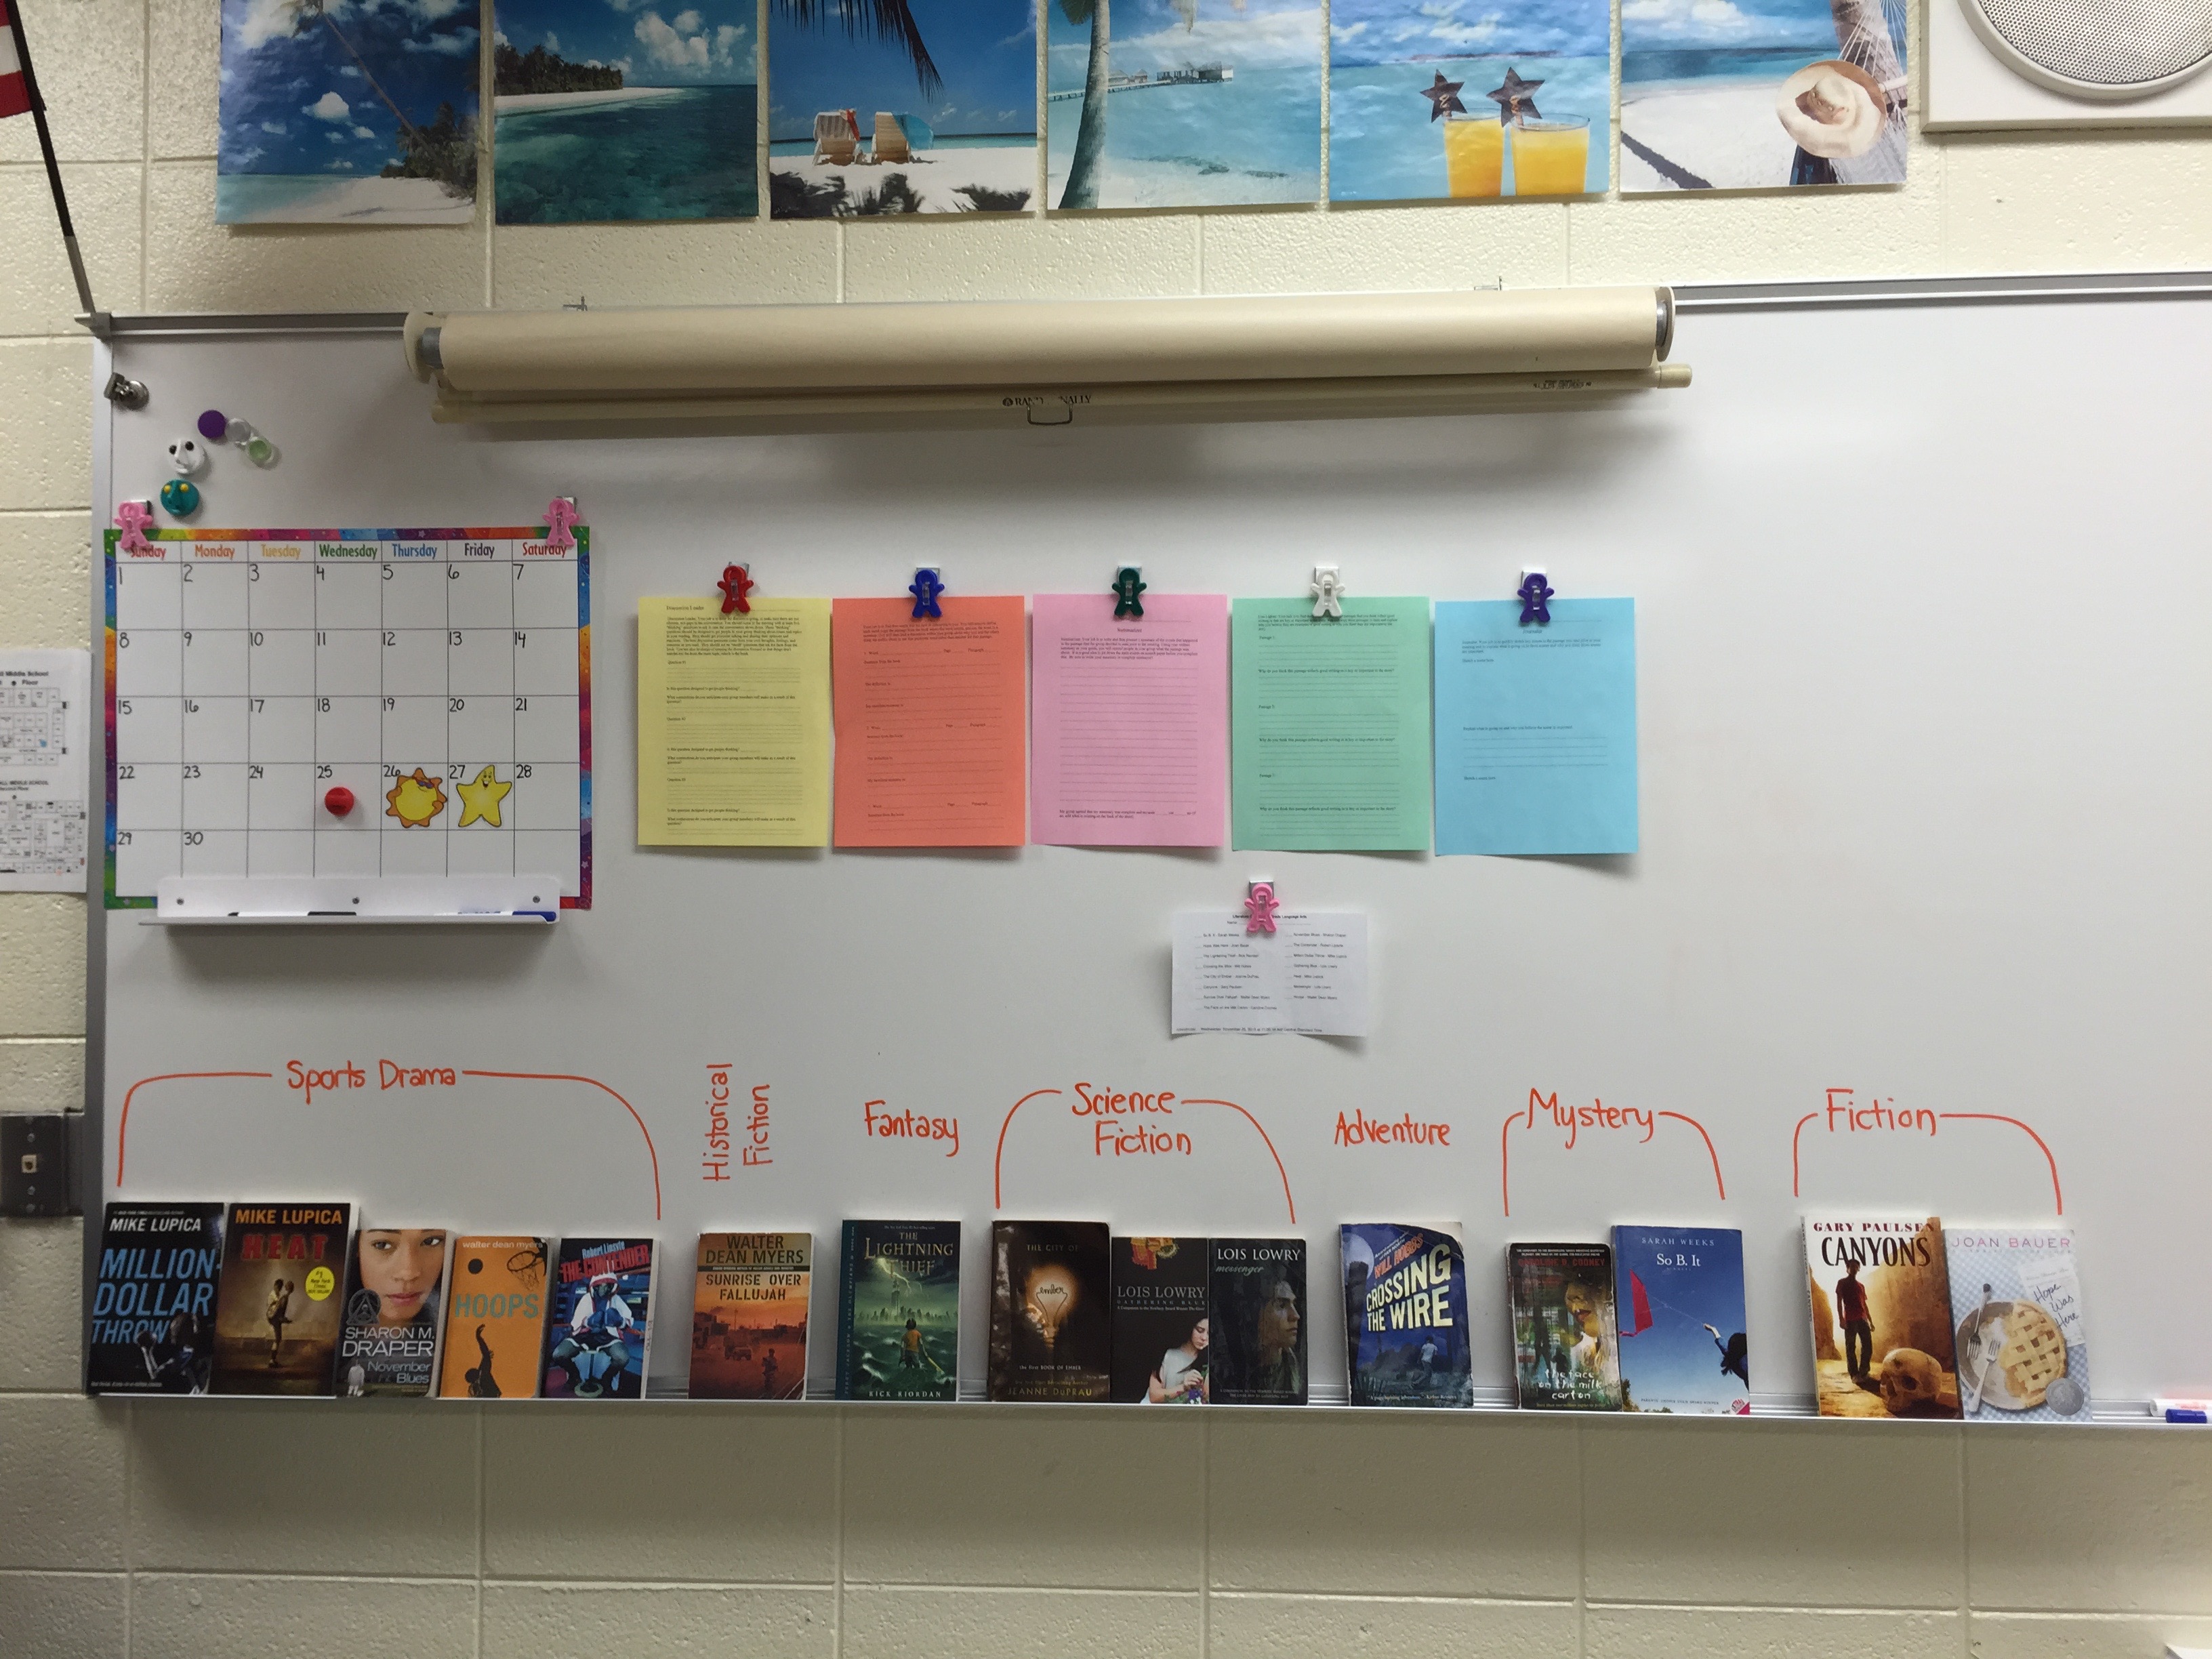
It was a lot of work to set up the Literature Circles, but once we got them started, it was a breeze. I began by going through my cupboards and pulling out books that I had multiple copies of (at least 4 per class, and I teach 4 classes).
I organized the books on my front board by genre, since that is usually the first thing I like to know about a book. I also looked up the Lexile levels for each of the books, noting for myself which novels were significantly above or significantly below grade level. Next, I printed and copied half sheets of paper for each student as shown below:
On our Literature Circle kick-off day, I began by simply reading the titles of the books in order. Then I stopped talking. Yes, this is hard for teachers, but you gotta do it – just stop talking! Resist the urge to say everything you know about a book and divulge why you love it. It’s so much more fun to put them into the driver’s seat and let them explore the books that interest them. Otherwise they’d be sitting there listening to you blather on and on about a book they have zero interest in, just dying for you to get to the one they want to hear about. That really takes the fun out of it.
I distributed the half sheets and explained that by the end of the hour, every student needs to rank his/her top 4 book choices. Next, I let them explore the books that interested them. I handed out copies of the books and encouraged students to read the backs and the first couple of pages to make sure the book would be a ‘right fit’ for them. I also pointed out which books were high or low Lexile levels, since that can be an important factor in selecting a novel. I know the students were looking at the number of pages, too, and that’s important as well. Why pick a really long book when you know you will struggle to finish it? I told my students that it’s important to have reasonable expectations and chose a book that you will both enjoy and be successful at.
I gave students all hour to explore the novels and make their choices. At this point, I bet you’re nervous that students began scheming and selecting books that their friends wanted to read. I am happy to report that the scheming was at a minimum. I made sure to emphasize that I can’t guarantee that every student will get his/her top pick, and that it is so very important to pick a book you will be successful with for the next month.
After school comes the hard work. You have to lay out all of the half sheets and organize the students into groups. I aimed for groups of 3 – 5. I would say that about 1/3 of the students got their top pics, but every student got a book in his/her top 4. I also made some mindful decisions to separate particular personalities, a concern that all teachers bear in mind when making groups.
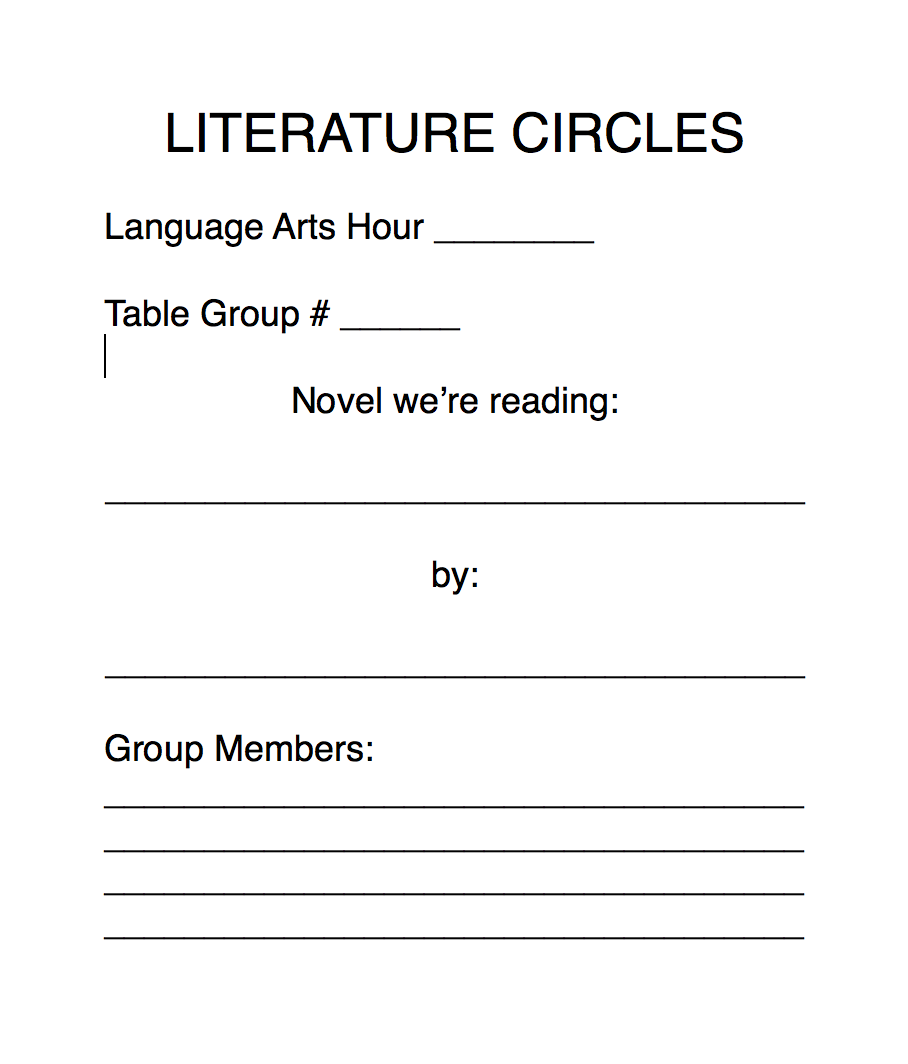
On Day 2, I announced the Literature Circle groups. We rearranged the room so groups could sit together, and every group had to fill out a cover sheet for their group folder as shown above. The folders were kept in the room at all times (especially important for absences!). Then, I distributed the novels and explained the procedure for the next month.
Every 3 school days, we would have a Literature Circle Meeting. In total, there would be 5 Meetings. Therefore, the groups must divide their book into fifths and determine how much they would need to read to be prepared for each of the 5 meetings. Also, everyone will perform a different role at each of the Meetings. The roles include:
Word Smith (choose 3 – 5 interesting, key, important vocabulary words)
Journaler (illustrate and explain 3 key scenes)
Summarizer
Line Lighter (choose 1 – 2 key passages and explain their significance)
Over the course of 5 meetings, everyone must perform each of the 5 roles once. Before we even began reading, I had each group make a plan for how many chapters/pages they needed to read for each meeting, and who would perform which roles at each meeting. Even if a student is absent, he/she is still responsible for their reading and role – which they know well in advance.
With all that hard work and planning out of the way, it was time to simply let the students read! They were responsible to themselves and each other for being prepared and staying on top of their obligations. Since they chose their own books, I believe they were much more interested and invested in this learning unit. Students wanted to read, and they were excited to talk about their books. I made a point of saying that I believe Literature Circles remind us why people love to read; they love to have someone with whom to share ideas and excitement about their reading.
Literature Circle Meetings
Every 3 school days (time for students to read), we held a Literature Circle Meeting. For the first one, I gave the students a challenge, because students love challenges! I put 8 minutes on my timer and explained that I wanted the groups to talk about their books and ONLY their books for the full 8 minutes, non-stop. I asked them if that sounded like a lot, too little, or just the right amount of time. They agreed it was a wimpy challenge, no problem! Next, we discussed how they would fill up the 8 minutes. I explained how each group member should explain his/her role and share the worksheet they completed. Then, group members should give him/her feedback on their roles. Sounds easy enough, right? Almost every group sped through and finished in less than 5 minutes. Not so wimpy of a challenge!
I had prepared for this outcome, however. While students were discussing, I went around the room (checking for work completion) and placed a laminated discussion card or two at each table group. I purchased the discussion cards from Rachel Lynette here. They are a fantastic resource! Thanks to these cards, we kept the conversation going a bit longer.
After our first meeting, I also took the opportunity to have a mini lesson on what makes a good discussion question. I had prepared a few questions ahead of time that typified clarifying and discussion questions, and we discussed the differences between the two. After Meeting #1, students felt confident that they would exceed expectations for Meeting #2.
Extension Activities
In addition to each of the 5 Literature Circle Meetings, I also planned 5 extension activities for each of the meetings:
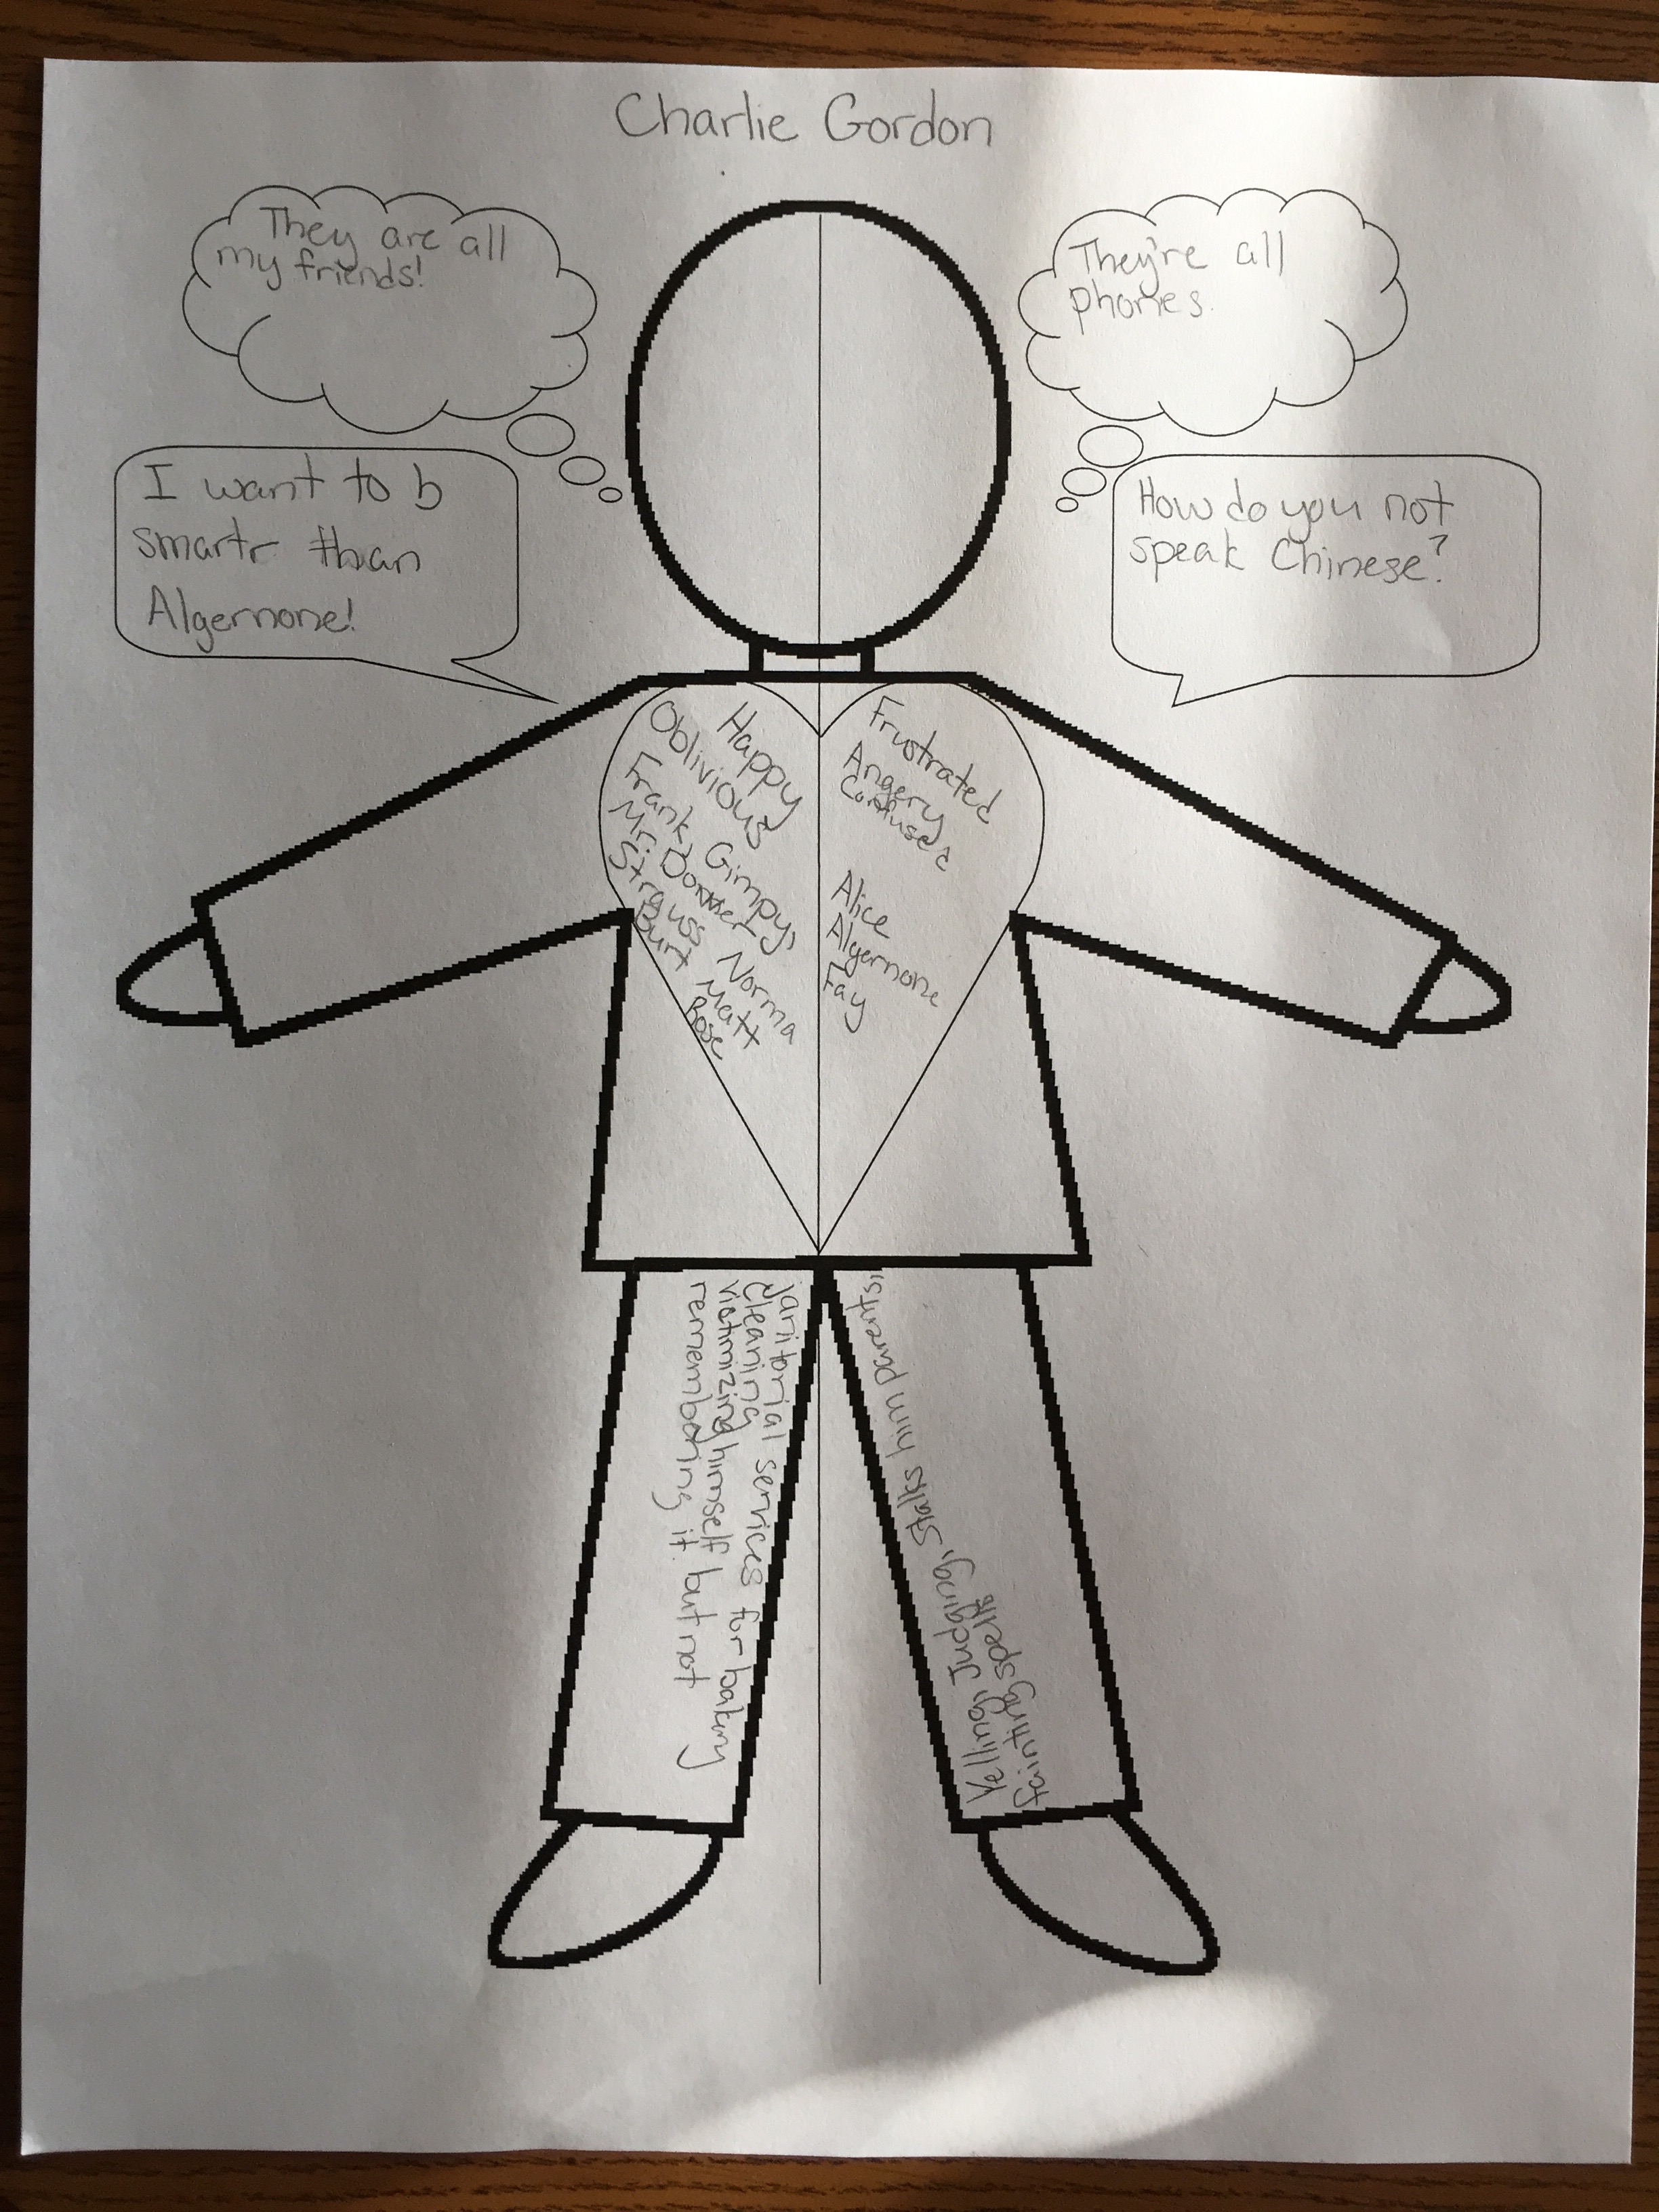
Before / After graphic: Meeting #1: As a class, we discussed how main characters are always dynamic, meaning they change in some important ways throughout the course of a novel. I used this graphic from Creatively Composing to help students work through how a main character in their novel changed. At our first Meeting, I only had them fill out the left side of the body, indicating a typical thing their character would think, say, feel, or do. We finished the graphic later, at Meeting #4.
Symbolic Item: By Meeting #2, students had a pretty good grasp of what kind of person their main character is. I had them select a symbolic item (one that could fit in a paper bag) to represent their character’s personality. The hitch? It could NOT be an item from the book – they had to think outside of the box. We got some pretty creative, abstract, and interesting ideas for this one!
Book Trailer: At Meeting #3, I had students look up a book trailer for their novel on Youtube. I had them watch and critique it to the class, sharing what they liked, what they thought the author got right, and what they would have changed about the trailer if they had made it.
Before/After graphic: At Meeting #4, I had students complete the right side of their Before/After graphic, indicating how their character has changed. Then, we shared as a class. Students noted a theme – most of the characters changed in their feelings or thoughts, not always their speech or actions.
Rebrand Your Book: At Meeting #5, the end of the novel, I told students that they were being ‘hired’ by a publishing company to rebrand their book to increase sales. They needed to give it a new title and cover art. They presented to the class and defended their choices.
In addition to the 5 Meetings and these 5 Extension activities, we also had Library Tuesday and Informational Text Wednesday, just to add variety to our weeks.
Reflection
What would I do differently next year?
Change up the novel selection – As it turns out, I would probably remove Sunrise Over Fallujah for 7th graders. I’d also like to add more fantasy and historical fiction options.
Less Busy Work – Reading is supposed to be fun. The group roles / worksheets? Not fun. I know I need a way to keep tabs on students and make sure they are keeping up with their reading, but maybe I could streamline this a little bit (or a lot). I don’t want to ruin the experience with banal, meaningless work.
Modeling – I’d like to do a performance Literature Circle for students, maybe a couple of teachers modeling the do’s and don’ts of how to run a Meeting?
Seating Charts – I have assigned seating in my room, and I normally change up the seats every 2 weeks. I do this to help students learn to interact with each other and to discover new ideas. For this month, I grouped students by their novels, and they sat together the entire time. I wish I hadn’t done this. I wish that the only times that students sat with their Literature Circle groups were for actual meetings. This way, they could be learning about other books throughout the month, and they could save their thoughts about their own books just for the Meetings.
Book Pitch – At the end of the month, I’d like students to try to pitch their book to other students in the class. Who better to get you excited to read a new book than a fellow student?
What did I get just right?
Timing – I’m glad I gave them as much time as I did to read in class (3 class days between meetings). I know this is a bit pessimistic to say, but I worry that without giving them in-class time, many books would not get read.
Informational Text – I’m very glad we continued to spend one day a week working on informational text. No one likes to do the same thing all day every day for a month straight! We also got to keep up on our other reading skills.
Discussion Time Challenge – At each meeting, I gave them a time challenge, and I increased my expectations by one minute each time. The first meeting was 8 minutes, and the last was 12. I put a timer on the board so students could monitor themselves. I think this was an important, appropriate challenge for middle schoolers to monitor each other and stay on task for an extended period of time.
So there you have it – my first attempt at Lit Circles. I’d love your feedback! Please comment below on what you’ve done in the past, or any other suggestions you might have for making Lit Circles a success!
If you work in the field of education, you have become all-too-familiar with the Lockdown Drill. This is our generation’s version of the Duck and Cover. Within my school, we do lockdown drills several times throughout the year.
During the drill, we turn off the lights, lock the door, and sit silently in a corner out of sight from the windows and doors. We remain this way for at least 15 minutes while an administrator, playing the role of ‘intruder’, walks the hallways jiggling each door and peering into windows to see if s/he can find anyone unprepared. This is how its done in every school across the country.
To prepare for lockdown drills, I always keep my door locked – always on the defensive. I’ve covered the windows by the door with paper. I keep a mental checklist of extra steps I would also take in a real lockdown situation, including having students barricade the door with furniture, shoving smaller students into closets and cabinets, grabbing my cell phone, and distributing classroom objects that could serve as makeshift weapons if our door is breached. Sounds pretty scary and….dark, doesn’t it?
You see, I’m quite serious about lockdown drills. Dead serious. I’ve been through active shooter training with the cooperation of our local police and fire departments. They fired a weapon in the school so we could hear what it would sound like. We practiced triaging and treating students, It was horrific, sobering, and terrifying all at once. I hope I never forget… no wait...never use the critically important information I received in that training.
I recently read this article, and it really hit home. It is written from a teacher’s perspective on the psychological trauma she and her students experience while ‘Rehearsing for Death’ during a particularly memorable lockdown drill with her Pre-K students.It emphasizes something I always tell my middle school students to keep them focused and serious during the drill. I tell them to treat each drill as if it is the real thing. Why? Because it could be, and we may never know. We have both planned and unplanned drills, and they all start the same way. We are simply told to “Go into lockdown.” The word drill is never used.
Preschoolers are hopefully blissfully unaware of the purpose and history behind lockdown drills, but middle schoolers actually know what’s going on in the world and that there is real reason to be frightened. As this mother asks, how do we talk to them about this? How do we mentally prepare them? How do we – can we even – protect them from the psychological trauma of simply living in fear of this very real and possible situation?
Is this upsetting you yet? It upsets me. It upsets my students. It has become our school culture of preparing to die. Imagine how this affects students’ learning and wellbeing. Will it always be this way? Are we ok with that? What will it take to enact a change?
What’s that? You’re already thinking about Christmas? So am I! I usually start planning in September. ESPECIALLY for crafts. You may remember a few of my favorite Christmas projects of the past, such as these paw print ornaments and this advent calendar. I love giving handmade Christmas gifts from the heart 🙂
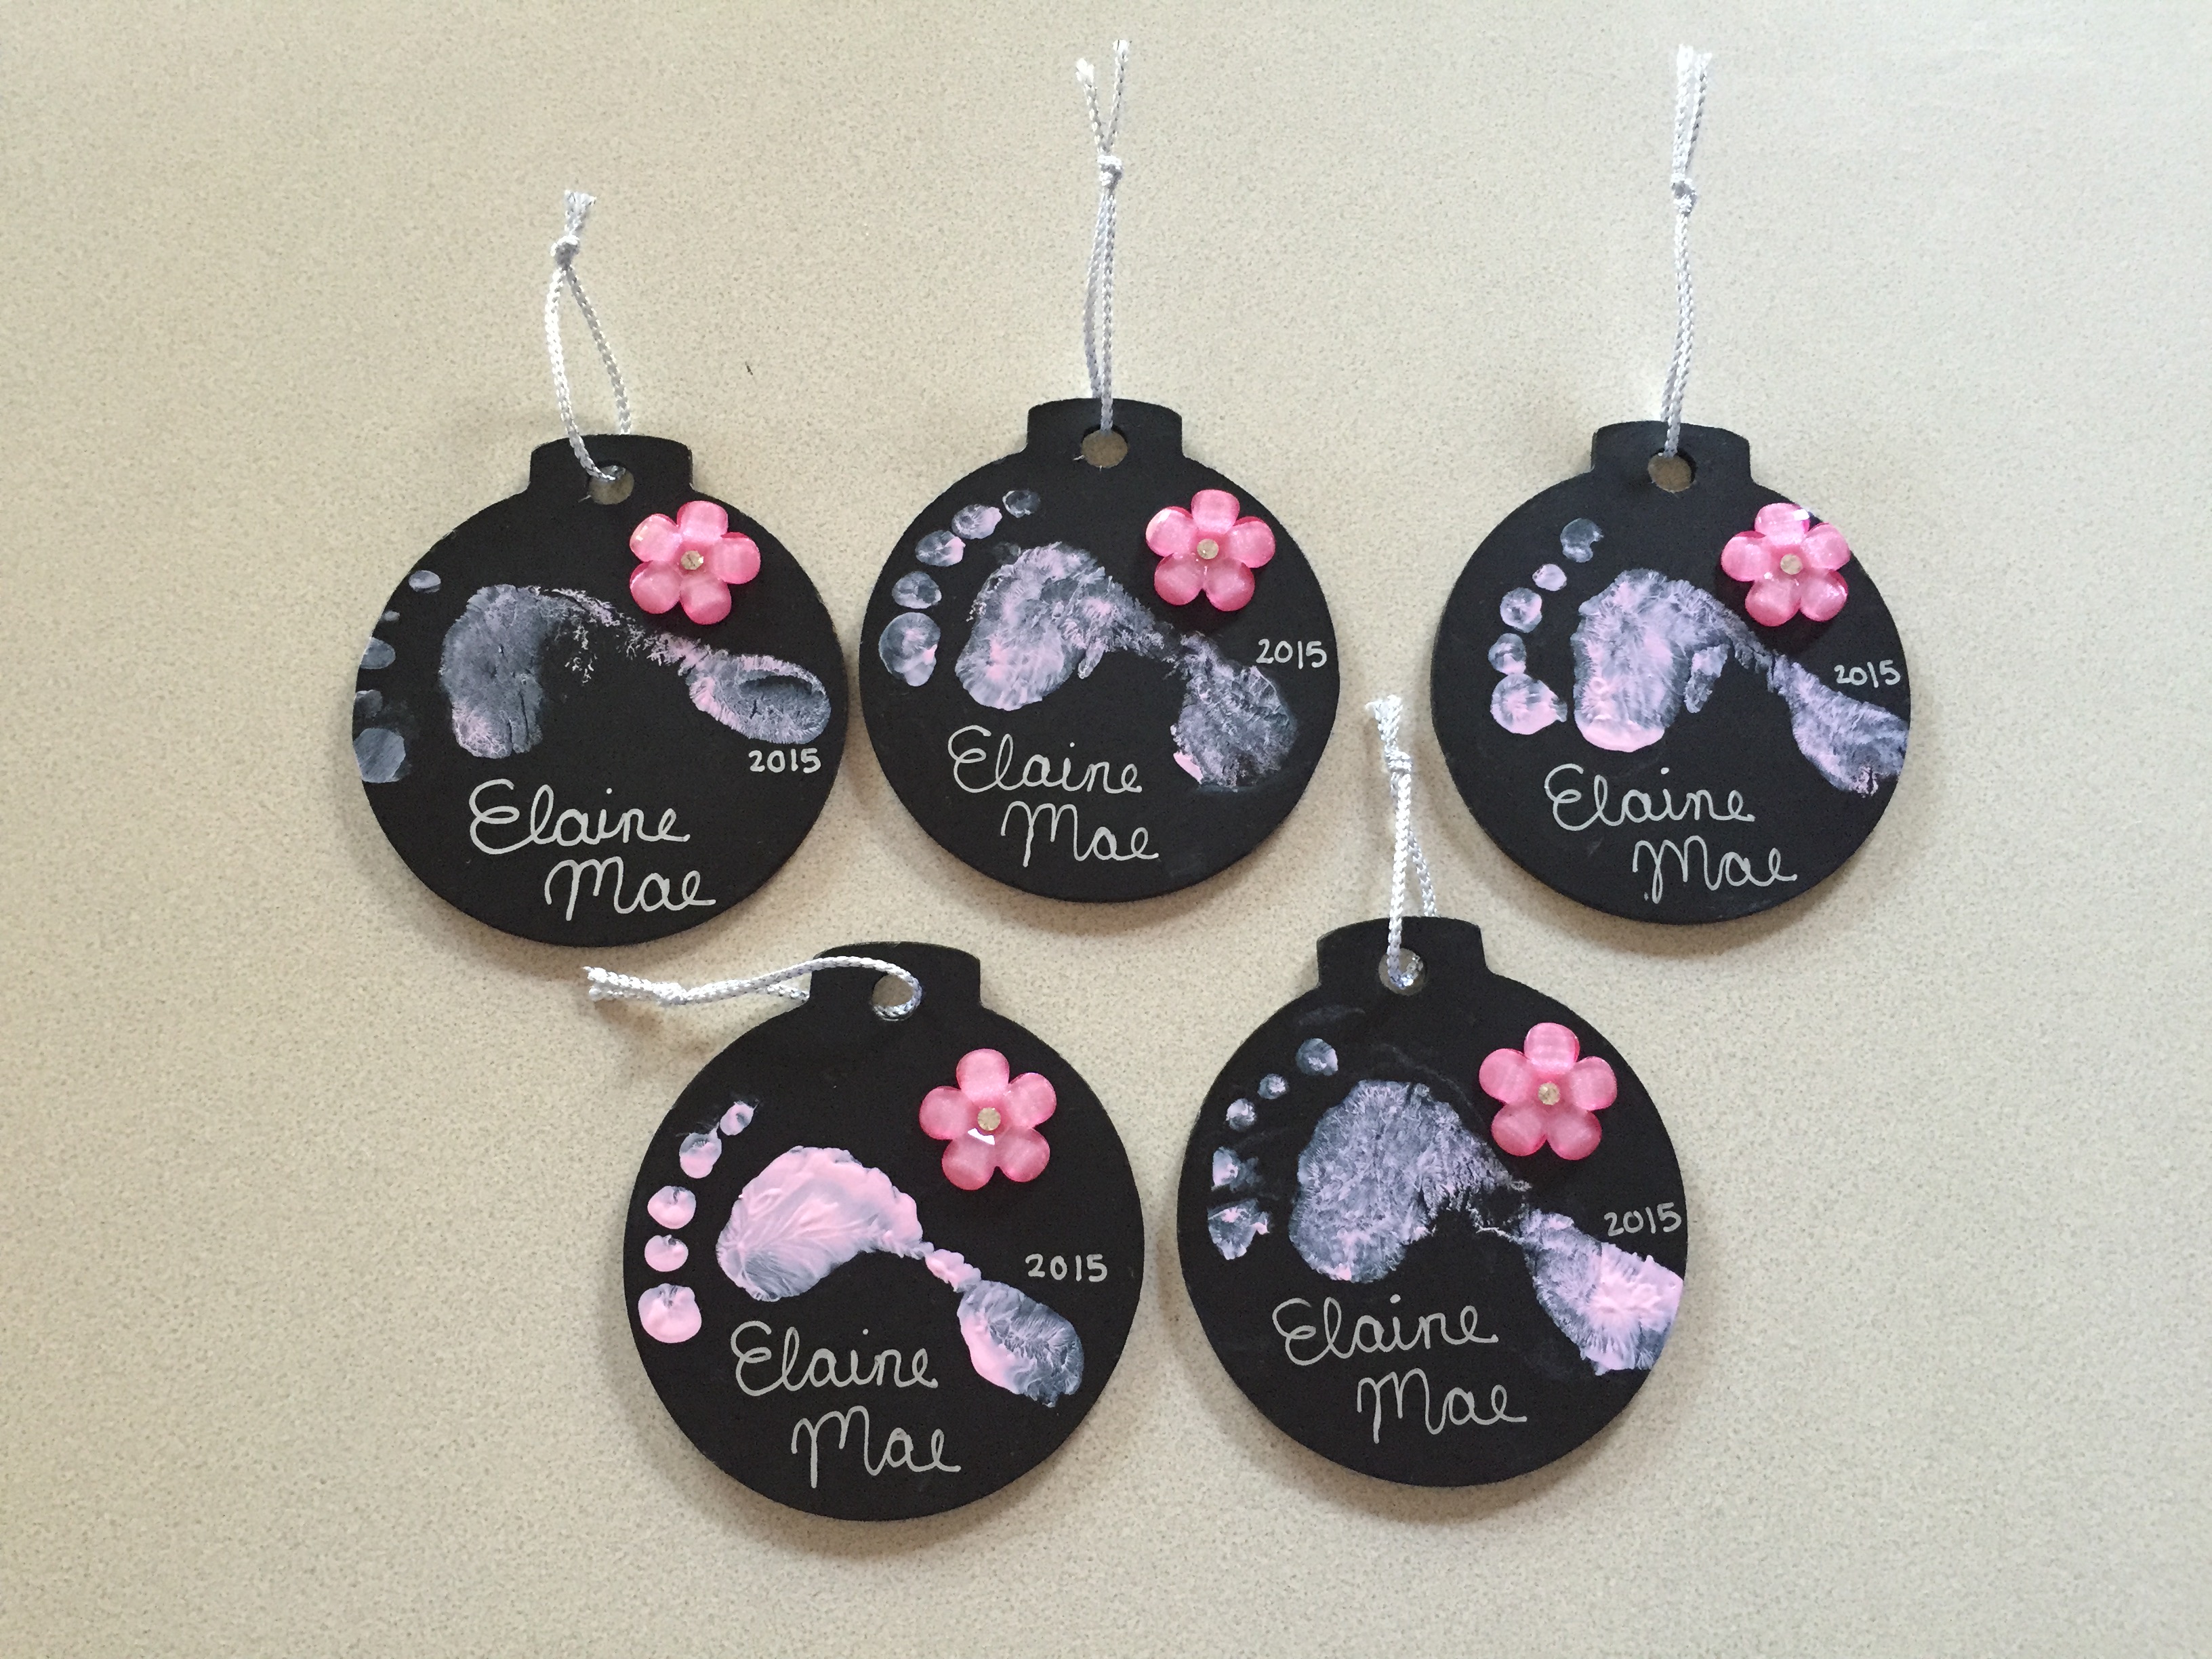
This year, we are making Baby Footprint Ornaments! They are super simple, cheap, and quick – so what’s not to love?
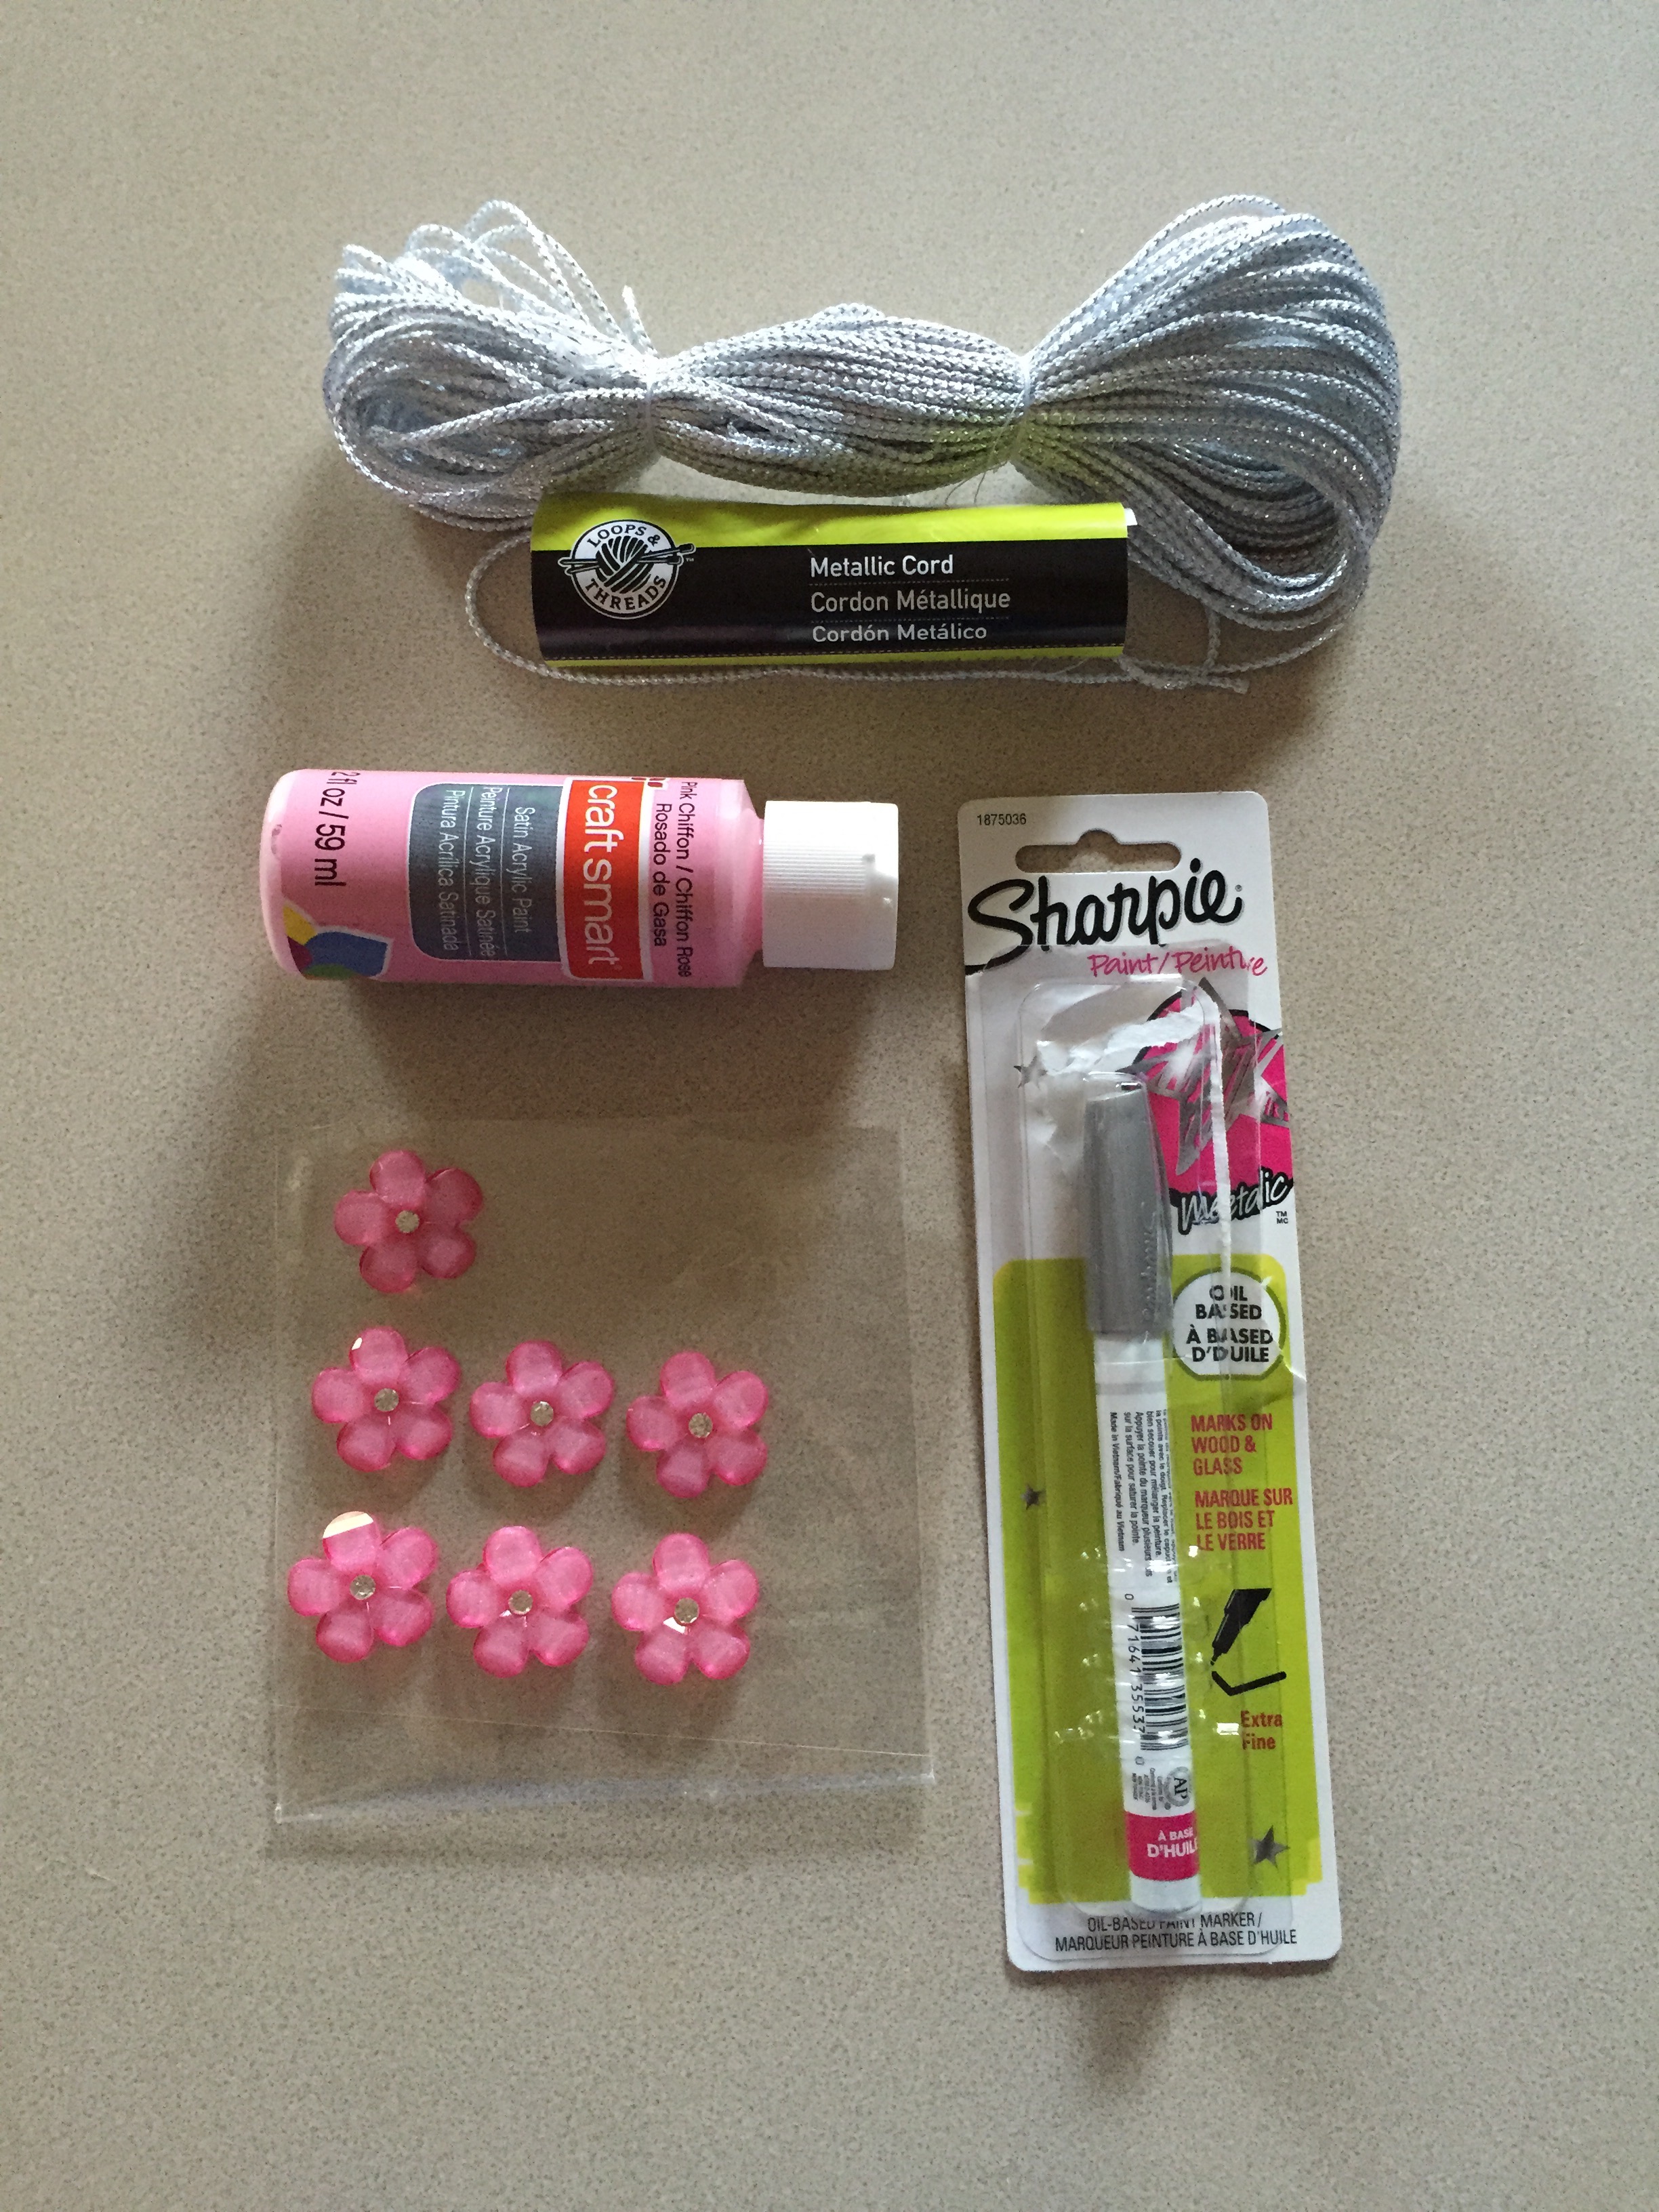
Materials:
The entire project cost me only $17.43, and I purchased all of the materials at Michael’s. Here is what I used:
The ornaments themselves were only $1.49 each, on sale for 40% off! I also purchased some acrylic paint for $0.79, a Sharpie paint pen (get oil based so it’s permanent), some metallic cord, and an embellishment (by the sticker aisle).
Other materials you’ll want handy:
* a paper plate for spreading the paint and dipping baby’s foot
* baby wipes for cleaning baby’s foot
* paper towel
* scissors for trimming the cord
Procedure:
First, I laid out all of the materials on the table so they were within arms reach. Once you start, you aren’t going to want to get up to retrieve anything you forgot.
Next, I laid paper towel under my baby’s foot. She’s pretty squirmy, but we managed to keep the paint contained. I kept a hand on her painted foot at all times. You may want to use a drop cloth or old towel/sheet.
Then, I spread the paint on the paper plate. A dime sized amount is perfect. You don’t want it too thick, just enough to dampen baby’s foot. Too much paint makes everything squishy and messy and you don’t get the neat details of baby’s foot.
Dip baby’s foot in the paint (blot off any excess with a paper towel), then roll the wooden ornament up her foot from heel to toe. If you make a mistake (or if baby squishes her toes, because paint feels so cool!), just quickly grab a baby wipe and erase the mistake. The final products above represent at least 3 tries on each ornament. I would wipe, let it dry, and try again. No problem!
Once you have the final look that you like, let it dry for about an hour (depending on paint thickness) before adding your text and/or embellishments.
Good luck, and I hope you enjoy this easy, quick, and cheap project!