Jul
2014
Poster Presentation Tips
I recently mentioned that I presented my research at the Reading Research Symposium at Cardinal Stritch University. I was very nervous about this opportunity – worried that I would be asked questions I couldn’t answer and that everyone would soon realize I was a complete fraud and take away my doctorate. I am pleased to report that this was not the case. I surprised myself at how eloquently I was able to answer all questions thrown my way, and with an abundance of detail, evidence, and visuals to support my claims. Of course I should have had more confidence – this is MY research after all! Many people are very interested in online reading comprehension, and I was happy to feed into their enthusiasm. What was more meaningful to me, however, was when we dropped the guise of research and someone would ask, “That’s wonderful. So, how would you use this in, say, an actual 3rd grade classroom?” That’s when I got excited. Turning research into practice – this is my bag, baby! I explained how I use these findings with my own students and some simple modifications I would use for various populations and grade levels. I directed people to more resources and ideas to support their own teaching practices with regards to online reading comprehension. I felt very helpful, which is the ultimate fulfillment for a teacher!
I walked away from this experience with a lot more confidence and some important notes, should I chose to do another poster presentation (which I definitely would!). Below are some tips I can share:
1. Laminate your poster – I envisioned hanging up my poster with tacks, but I was handed a role of masking tape instead. I wish I had laminated to protect my expensive investment.
2. Have a handout – Poster presentations are never as long as people would like them to be, and there is a lot of information to juggle. Visitors would appreciate a handout with a brief (very brief! 1 page, tops!) summary of your research as well as your contact information.
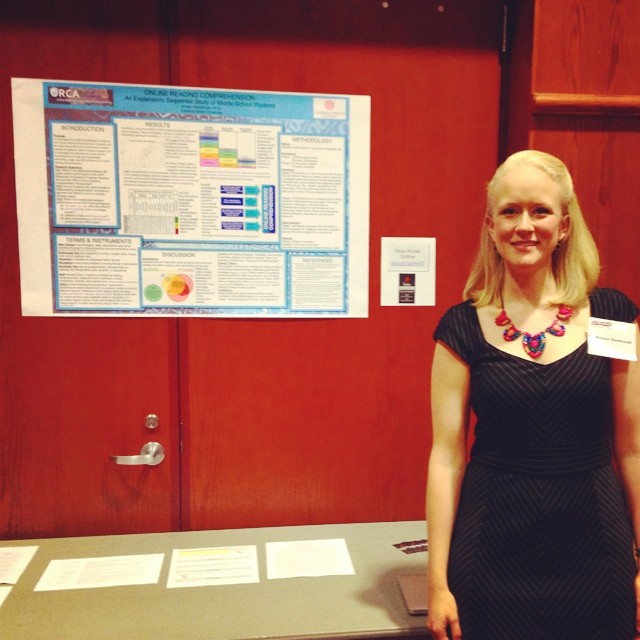
3. Put your poster online – Speaking of accessibility, visitors would appreciate a chance to study your poster in greater depth at a later time. It is helpful to place your poster online and give them a url (or tiny url) where it can be accessed. In the picture above, you will see a small paper just to the right of my poster – this contains a tiny url link to my poster on this blog as well as a copy of my business card (and email address).
4. Business Cards – If you have business cards, bring them and put them on display. This is an excellent opportunity to network.
5. Bring plastic sleeves for any supporting documents – As you can see in the picture above, I brought along several supporting documents like charts, explanations of my coding system, visuals of the assessment I used, etc. Visitors confused these with handouts, and some of them walked off. I wish I would have brought plastic sleeves to indicate that these items can be viewed but should stay on the table.
6. Classroom Tools – I have many exciting classroom tools and learning activities that I have subsequently developed as a result of this research project. My visitors would have loved to see them to witness how this research translates into practice. Bring along any visuals, interactives, tools, and assessments that apply to your research.
7. Common Questions – Be prepared to answer quick, common questions from multiple visitors. Here are some that I was asked several times: “What surprised you most about your research?” “What is the one most interesting thing you found?”
8. Poster Session Survivor Toolkit – Be sure to bring the following to your poster presentation: water, scissors, tape, a pad of paper, pen/pencil.
Be sure to look professional, wear shoes you can stand in for a long period of time, and have confidence and have fun! You never know who you’ll meet, or what exciting new ideas and opportunities you can discover!
![]()

